

A Sunday game at Chris Flowers barn and Chris Charlton put on a fabulous Tangiers game.

The year is 1680, King Charles II was given the port of Tangiers as a wedding present by Portugal some time ago, something of a poisoned chalice as the Moors had been trying to recapture it for some time.
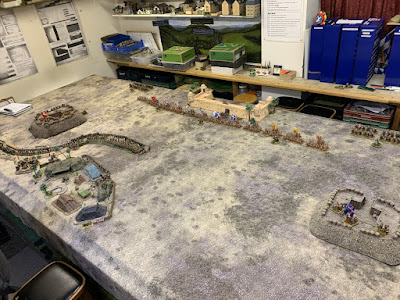
Diversionary attacks have drawn away the main Moorish force whilst the British advance out of the City gates, we have two forward fort-lets each with a small garrison and the right hand one (From an English perspective) commanded by me has been mined by the Moors.
For a minor victory we must capture the trenches and hold both forts. Full victory drive the Moors from the field. In turn the Moors must hold both forts and trenches for a minor Victory or drive us from the field for a full victory.
 Each unit represented a company of foot or a troop of horse.

Our plan was for me to take two thirds of the foot and try to storm the trenches whilst my cavalry held the right flank outside the forts and Dave with the other third of the foot and half the cavalry held the left flank and all the returning Moors to buy me some time.
A decent enough plan in theory.


 There are plenty of Moors packing the trenches supported by two rather large cannons.


 The setup looked great so I couldn't help taking lots of photos.


 Move one and half my forces refuse to move and one company blunders and retreat a full move back, not a great start. However my cavalry move to cover the right flank and Dave's troops get going.

 Moorish move 1 and with no pre-amble they roll to explode the mine beneath my fort and BOOM!


Not the most auspicious start for the English.
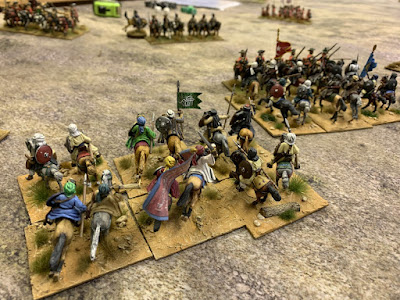
 A horde of Moors now pile on including camel mounted tribesmen. There are a heck of a lot of them.
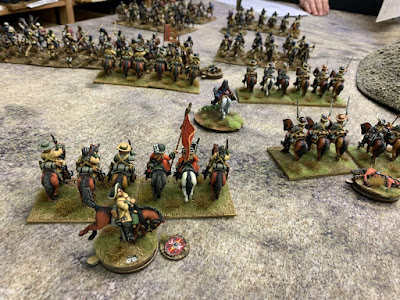
 A division of cavalry on the right flank facing my 4 troops of English horse with the same on the other flank facing Dave's "Spanish" horse. A division of infantry also march on to face Dave and his four companies.


 A sharp cavalry engagement sees off the first of the Moorish cavalry on the right with minimal casualties to the English horse.
 Whilst the first foray is seen off there is a heck of lot more of them coming and they are supported by camel mounted guns. Its going to be hot work.

 In the centre the majority of our infantry have pressed forward and are formed ready to assault the trenches. I am still deciding how good an idea this is, they may not be well armed but the Moors are numerous and well motivated.
 The camel guns get into position and I pull back my cavalry out of range. They are hard pressed enough without losing troops to zamburek fire.
 The camel troops press forward, I wonder how tough these chaps will turn out to be.
 On the left flank Dave has similar issues, the Spanish cavalry are pretty good but the Moors are far more numerous and just keep coming.
 My Assault on the trenches goes in and the Moors are pushed out the back. So far so good.
 Dave takes his four companies of foote into a line supporting the small fort. His right flank is in the air but not too far from my assault on the trenches so I hope to be able to support.
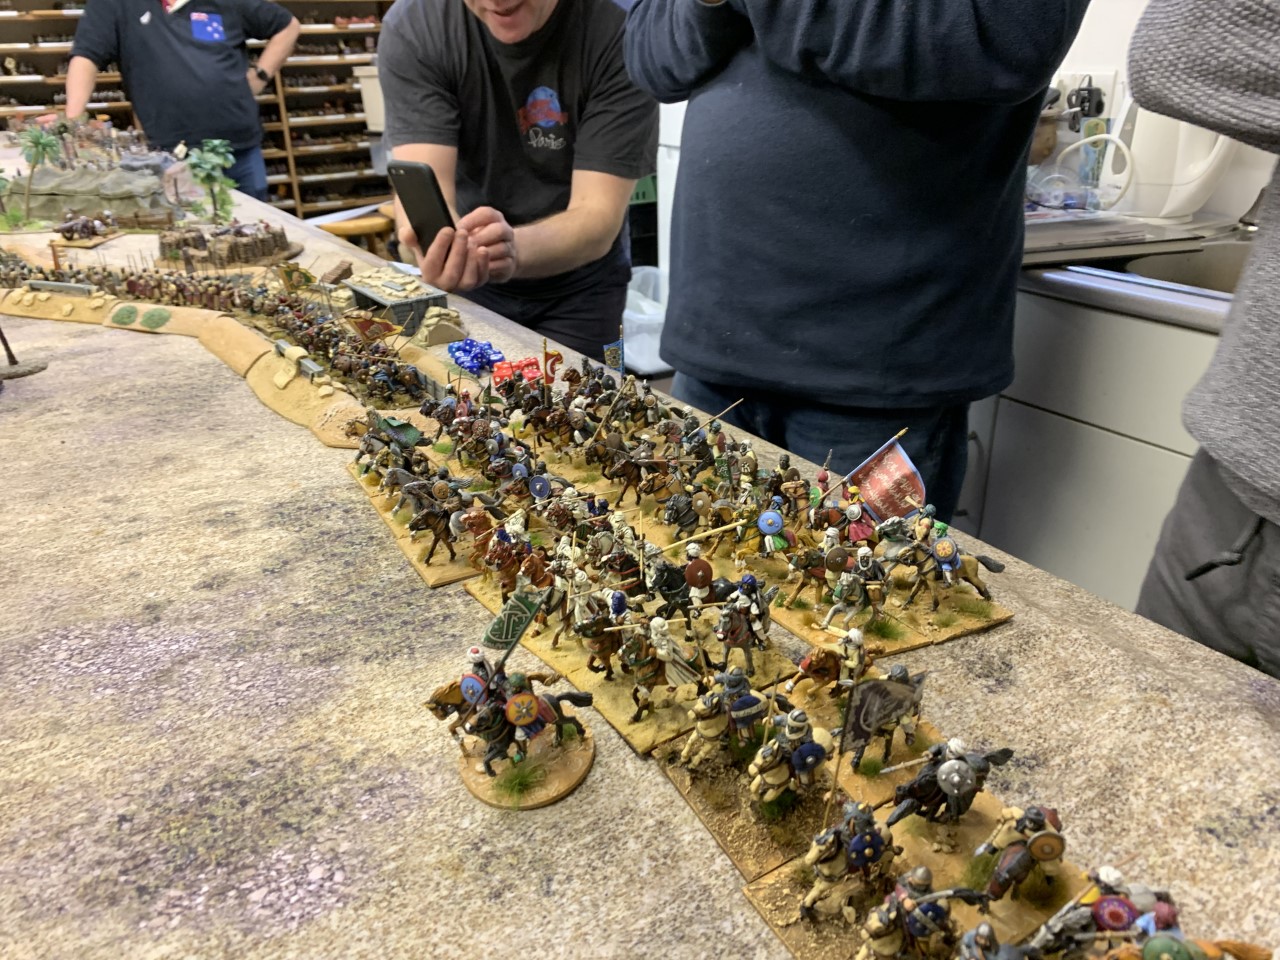
 The Cavalry melee is in full swing, Dave is holding off the hordes but having to pull back his first troops to try recover whilst his second lines go in.
 I have not had to fend off camels with cavalry before but the English horse manage it and the Cameleers are repulsed.
 The camel guns are prepared to fire again and the English cavalry pull back out of range.
 Having taken half of the trenches two more companies push forward to try take the rest.
 Meanwhile the fort keeps a galling fire going on both the trenches and the cavalry.
 In the rear the company that initially blundered finally get going to try plug the gap between the fort and the English horse and add some firepower to the uneven cavalry struggle.
 The left hand companies in the trenches volley the Moors to their front to try finish them off but the Moors hold.
.jpg) The Spanish horse continue to hang on but as casualties mount its looking increasingly dicey.
The Spanish horse continue to hang on but as casualties mount its looking increasingly dicey.
 Back in the trenches a further volley finally sees off the first unit of Moorish foot. We are free to turn a couple of units to cover Daves flank.
 The camel guns have become an annoyance so the English horse charge them and see them off too.
 Two more companies get into the second unit in the trenches and clear them out, things are coming together on the right of the English line.
 With less troops facing more Moors the left of the line is doing less well. I need to crack on so I can throw in some support.

 Throwing caution to the wind the last unit of Moors on the right charge out of the trenches and straight at the tiny unit in the fort. If they get in surely their superior numbers will overwhelm the brave defenders.
 Supporting the foot the Moorish left flank cavalry surge forward again.
 Accompanied by more camels.
 The Moors break into the fort and is vicious hand to hand, however the grenadier company manages to charge in and support the depleted garrison. Its nip and tuck.


 I have now refused Daves flank with two companies and between us we are able to pour a decent amount of fire onto the advancing Moors, pushing many back.
 In the centre, two volleys and two charges eventually sees the capture of the Moorish siege guns with minimal loss.
 However as we struggle to hold off the hordes on the left two big units of black guard charge the small unit in the fort and it is quickly overwhelmed.
 The right is secure, although there are still plenty of Moorish horse we have the numbers to halt them and a further company of foot has made it up to help drive them off.

 Despite losses the Spanish cavalry on the left continues to hang on and delay the mass of Moorish horse, which is now much depleted.
.jpg) On the right the Grenadiers tip the balance and push the Moors back out of the fort, the Garrison of the Fort however was first put to the sword, and the right is now pretty secure.
On the right the Grenadiers tip the balance and push the Moors back out of the fort, the Garrison of the Fort however was first put to the sword, and the right is now pretty secure.
 The fort on our left is now firmly held by the Black Guard and we will have to storm it to re-take it.
 There are though still plenty of Moors to keep the other companies busy so its going to be tough detaching units to complete the task.
 Fortunately the troops released from the storming of the trenches are able to support, although its by no means a certain outcome, there are still lots of the Moors.

 Dave manages to get one company in position as the rest struggle to fend off the Moors. Its a tough ask mind you.
 At this point we call the day, with the trenches and fort on the right secure but the fort on our left lost.
.jpg) Chris considers his verdict, both sides needed to hold the trenches and forts for a partial victory or drive off the enemy for total Victory. As nobody has achieved the full Victory conditions, rather than a draw Chris announces everyone has lost! Fabulous of course we have. A really fun and hard fought game. Thank you gents. Look forward to the next outing.
Chris considers his verdict, both sides needed to hold the trenches and forts for a partial victory or drive off the enemy for total Victory. As nobody has achieved the full Victory conditions, rather than a draw Chris announces everyone has lost! Fabulous of course we have. A really fun and hard fought game. Thank you gents. Look forward to the next outing.


.jpg)


The left is another matter as one of Daves units is forced to retire and the rest struggle to hold the Moors.

.jpg)


.jpg)
Thanks for dropping by.