With mission creep meaning I already have more 40mm Peninsular Napoleonics than I can use in a Sharp Practice game we decided we needed to look for something a bit larger but still fast play for the odd game with all of the figures on table.
I had already got to a point where I had far more than I can use before picking up a whole bunch of lovely part painted Spanish from the work bench of the late Tony Runkee. Once painted I will have at leats 5 battalions per side, more than Sharp Practice is designed for.
Most rules are aimed at army level with at least a few dozen battalions per side, we are looking for something around the 3 - 6 battalions per side level with supporting skirmishers, cavalry and guns. Black Powder would probably cover it ok but we already use this for other periods and their is a pathological un-willingness to attempt Napoleonic with Black Powder across our group.
Victrix have a couple of page fast play rule set designed for 54mm figures, as I understand it by Barry Hilton, we decided to give these a go, I dont think they are quite the finished article at just 2 or 3 sides of A4, but give perhaps a good starting point and worth a go, plus its a free download so nothing lost if they dont work out.
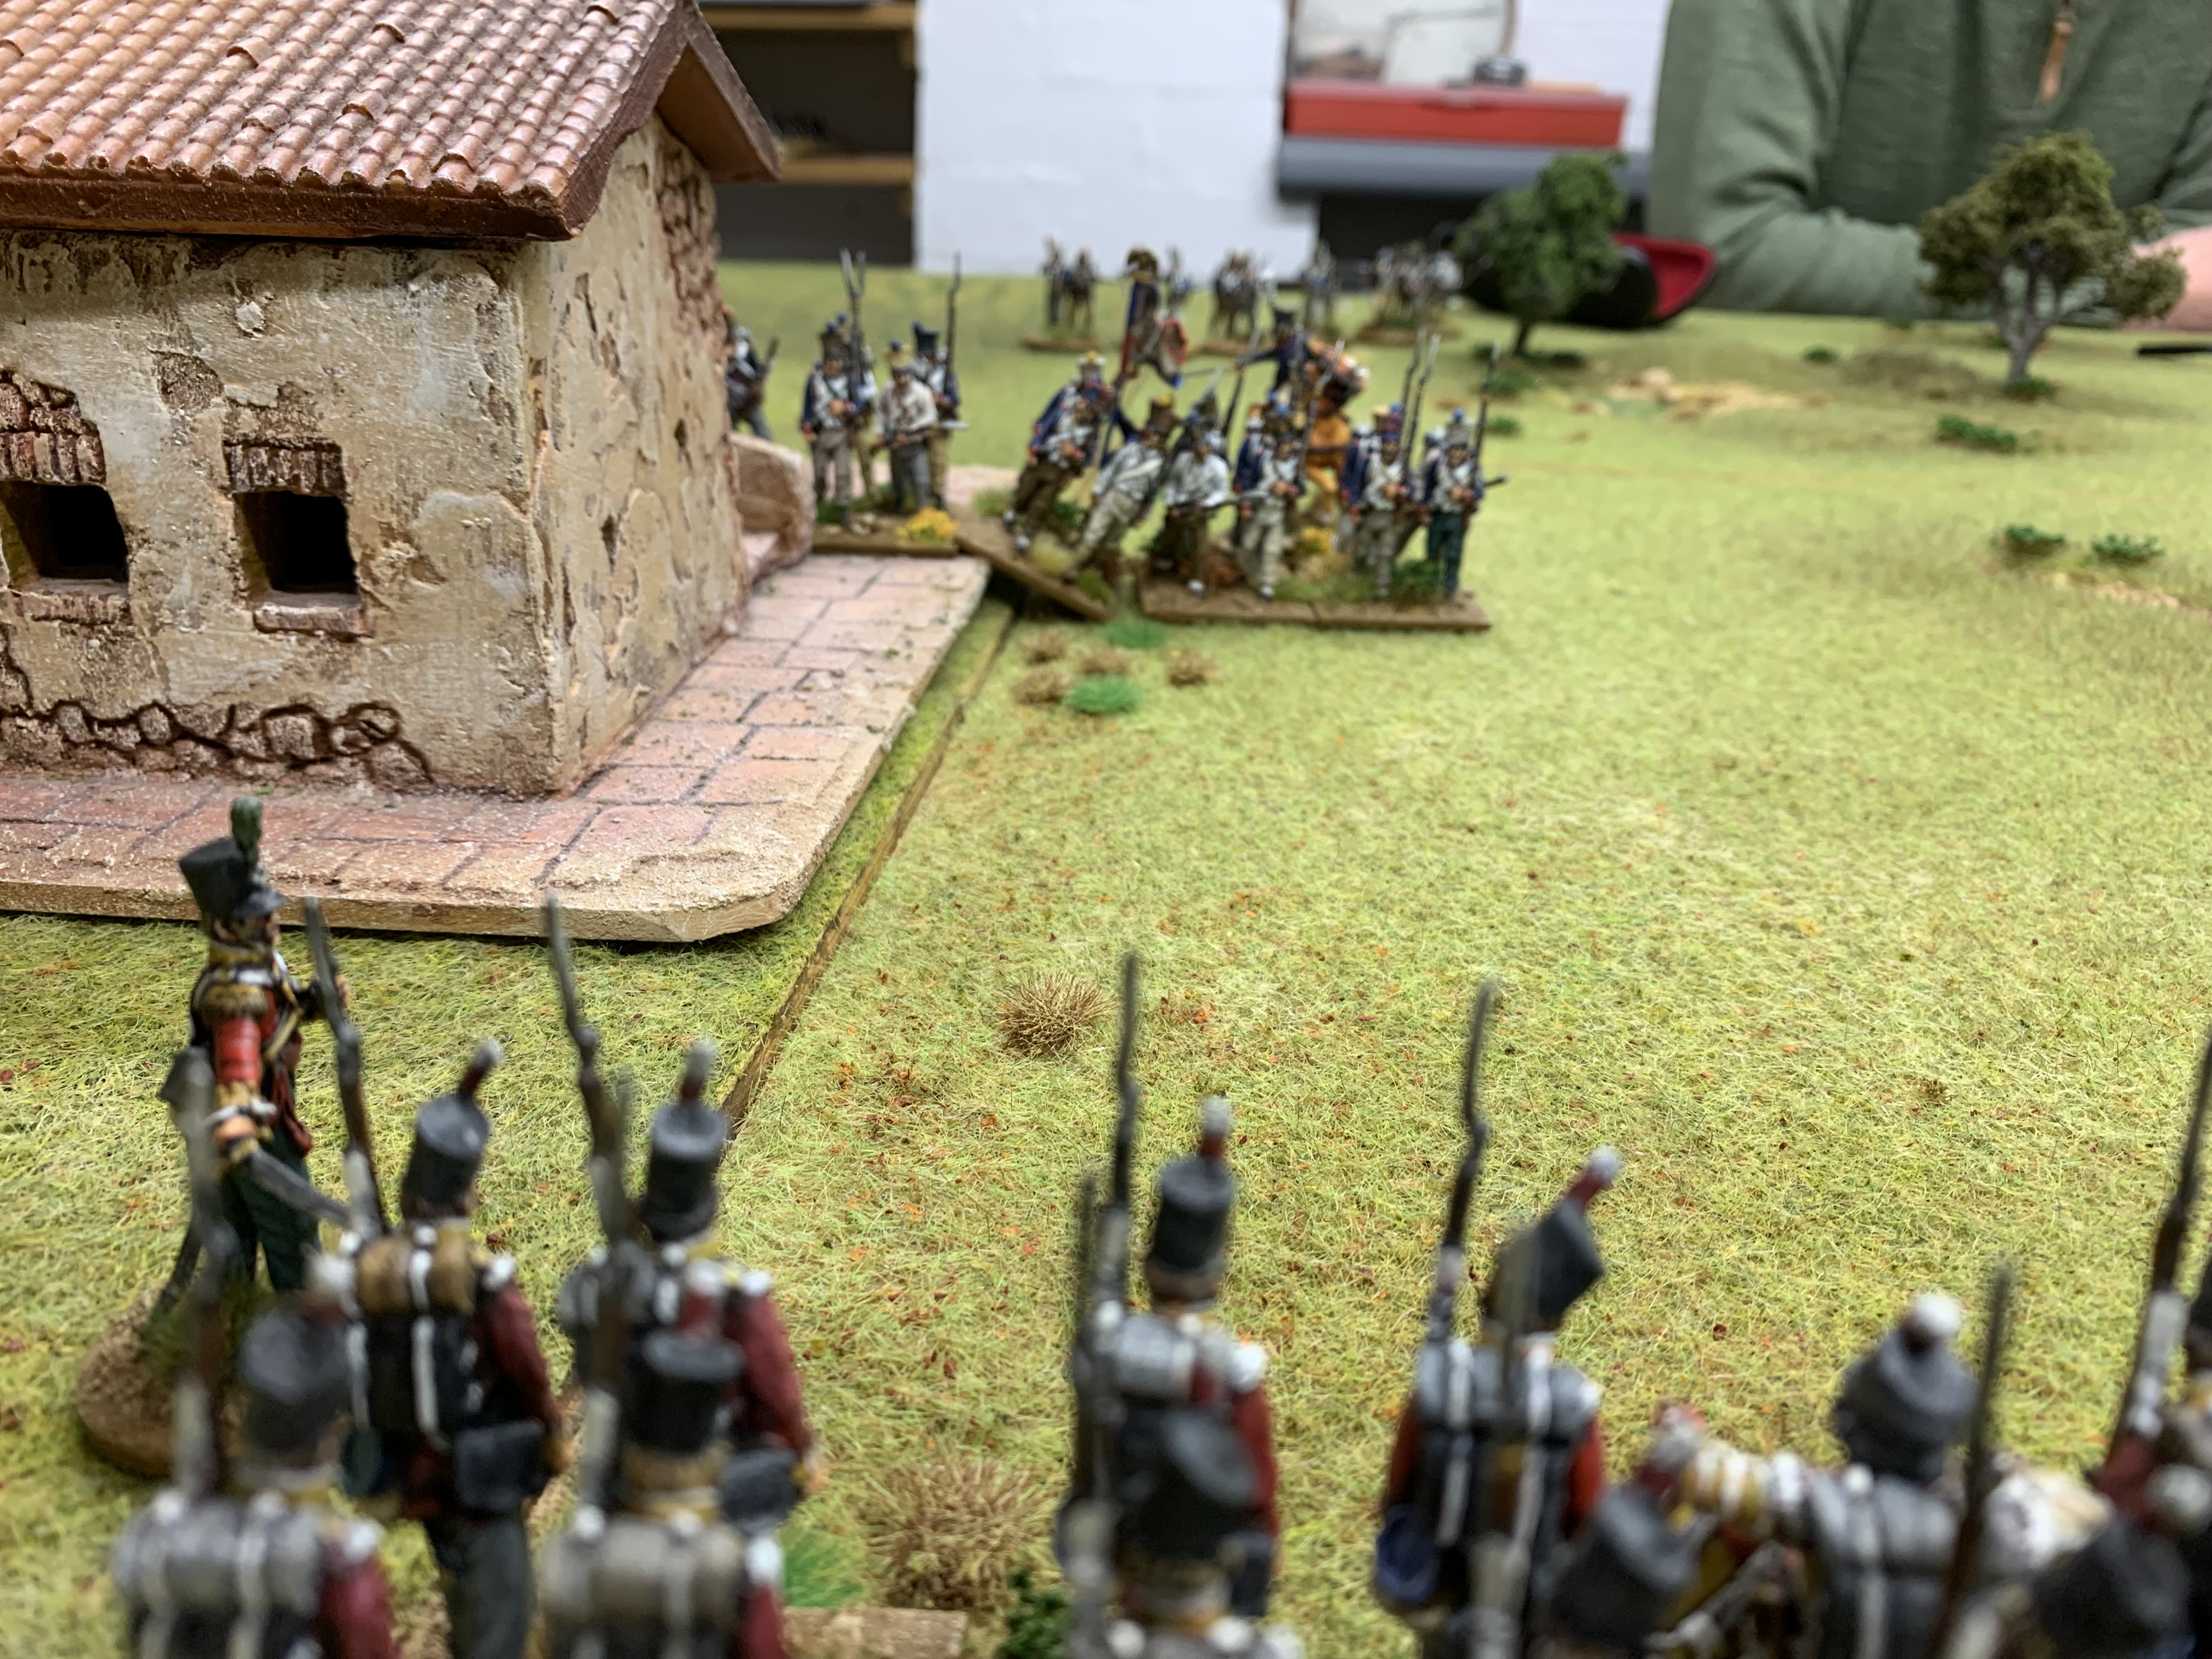
I used the majority of the 40mm Collection, the French have 3 columns, 32 fusiliers, 16 Grenadiers and 24 Paris Municipal Guard Grenadiers. These are supported by 8 Hussars and 6 skirmish screens each of 6 figures.
The Allies have 2 formations with 24 British Line and 40 Spanish Line, these are supported by 5 units of skirmishers, 2 60th Rifles one British Lights and 2 Guerrillas plus a unit of 8 British Light Dragoon.
At first glance with 2 sides of A4 and the rules do seem very basic indeed and probably not what we are looking for, but a quick game will let us see if there is a basic mechanism there we can develop.
Once the game was set up Steve glanced through the rules and declared "These are not the ones I meant" oh well, we are here now give them a go anyway.
Chris commands the Allies and roles highest for initiative allowing him to move first, the Guerillas are deployed partway on table to give them a chance of finding cover and to help them out against the superior numbers of French. The rules call for a morale test on every unit before moving needing to make higher than a 2 with modifications on 2 D6. Just the Dragoons fail and have to wait to deploy, everyone else gets moving with the infantry pushing on 8 inches each.
Next the French, all formations get forward with the Cavalry getting quite close to the British, 2 units of Skirmishers however fail and fall back 6 inches
Chris took the opportunity to place the bull in various intimidating positions throughout the game, I do fancy having this play a part in some of my Sharp Practice skirmishes in future, something unpredictable for both sides to worry about.
Move 2 Allies get initiative again, the Guerillas press on to occupy the buildings followed by some curious goats.
At the approach of the French Hussars one group of rifles fails morale and falls back whilst the light dragoons pass morale and deploy onto the table.
The French fire and see off one unit of Guerillas.
Meanwhile the French Hussars charge the Spanish, there is no closing fire and chargers fight first before the survivors of the charged fight back, the Spanish are absolutely decimated, however enough remain to inflict serious casualties on the Hussars who are in turn charged in flank by the Light Dragoons, whilst there is no factor for flank or rear charges the Light Dragoons are still able to wipe out the Hussars.
We take the opportunity to stuff our faces with biscuits as we digest this turn of events.
The remaining Spanish fire a long range volley at the Grenadiers with minimal effect.
In the buildings the French skirmishers have ejected the last of the Guerillas who flee. A further round of firing into the rifles reduces the end unit from 6 to 1 man.
The French look to have the advantage now with the Spanish badly mauled, however the Allies have a unit of untouched cavalry between their two forces which could be tricky.
The Spanish have skirmishers on their right flank and two units of French to their front, of their original force of 40 only 9 remain standing but they continue to pass their morale.
Desperate times call for desperate measures, whilst the rifles support the mauled Spanish the British line charges the French column. They inflict significant casualties on the French.
The cavalry advance to threaten the French flanks and are as yet untouched by casualties.
The British see off the French column whilst taking 50% casualties themselves.
Meanwhile the Paris Guard fail a morale and fall back whilst the Grenadiers take casualties from the Spanish and Rifles.
Both sides have fought themselves to a standstill, the French left has retired into the orchard safe from the British Dragoons whilst the British on the left are not strong enough to push and take advantage of their win over the French column.
At this point we call the game and chat through the rules.
We decide that they are not really for us although they have some nice elements and it was great to get the 40mm on table in numbers. The rules are simple and bloody with some nice mechanisms but not a fit for what we are looking for.
Late in the week Steve finds the actual Barry Hilton rules he was refering to and emails them over. They look a bit more promising so we will try these next time.


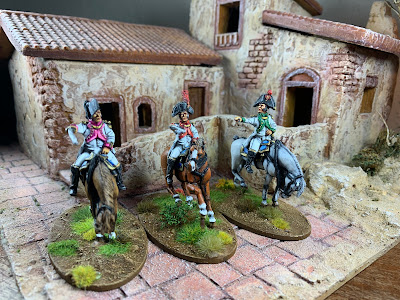 Tony has made a cracking job of these and the standing horse looks great.
 For this chap I cut a plume from a French Hussar and used greenstuff and araldite to stick it on.
 This grey is probably my favourite of the horses.
 The building used for a back drop is an Old Glory 25mm believe it or not and slightly oversized even for 28mm so perfect for my requirements. A cracking model very kindly donated by my friend Chris Charlton.
 You can tell the difference in pictures straight away for this my work camera, the colours are quite different and so is the focus.
 I have used similar angles but not got as close up with most of these images.
 All three are lovely figures although I don't have a pink unit (I cant find evidence that there ever was one) so this will just need to be an extra command figure.

 The painting on this Green faced officer was slightly less progressed than the others, in all three cases I need to do the second and third layer of flesh and the metal work which was nice actually as I meant I could add something of my own to them and they wouldnt look out of place. Of course the basing will tie them to the rest of the colelction anyway.

 So 30 or so part painted Spanish to finish and then another 25 or so completely unpainted to get on with.