Sunday 26 May 2019

Back to Great Northern War AAR

We decided we needed to get back to Black Powder Great Northern War so organised a game at Steve's, Mark couldn't make it so it would be just my figures.

We would use the heavily amended Black Powder that Steve has worked on and Chris Charlton would be playing the rules for the first time and we would be utilising some of Steve's fantastic new terrain boards.

The Swedes had 8 battalions of foot in two brigades each with a gun, two units of Cavalry on the left and 4 on the right.

The Saxo-Poles had 3 Brigades of 3 foot and 3 guns, 8 average and one superior foot. Supporting these would be 8 units of horse in 3 brigades. The Allies had the first two brigades holding earthworks in front of a village and a further Brigade in reserve behind the village. Bizarrely my only Russian foot unit would play the "good" unit as it stood out from the rest (historically the Saxons thought the Russians so poor they insisted that a brigade at Fraustadt revers its coats so they looked like they were Saxons and the Swedes wouldn't target the "weak point" in their line).  Right of the village were two units of poor Polish horse, Left of the village 3 units of average Saxon horse then 4 units of Russian/Cossack horse. One of the Saxon horse units would be dragoons with the option to dismount.
With no messing about the Swedes began to advance, the cavalry on my right getting three moves and so belting forward 36 inches (movement in our game is at 2/3 the book moves)

The foot on the right only manage one move and the cavalry conformed to cover their flank.

In response Chris charged his poor Poles at my left unit which counter charged. With ferocious charge the outcome was predictable with both Polish units failing their morales after losing significant casualties. However they left the first cavalry unit with three casualties and therefore shaken and unable to charge anything. They withdraw but take a traversing shot from the Gun on the way, thanks Chris!

I oblique one of my foot units left to extend my line and march the rest straight at the field works, the right hand brigade is finally moving my horse are sticking to their flank like glue.

Chris has moved his reserve foot brigade to cover the flank of the village and moved one of his battalions into the village to refuse the flank. As we move into range I am peppered by the musketry and artillery and only the improved saving throws on a 3 or more keep the Swedes in the game and moving.


Chris moves his left most cavalry brigade into a position to charge the flank of my cavalry if I ride past the wood but otherwise contents himself with some long range artillery at my horse on the Swedish right.
The Swedish foot now charge home on the left flank and the initial closing fire from Chris is not great, however with the earth works he manages to hold both charges and inflict some damage on my supports with his artillery.

Two rounds of melee sees the Swedes still held up on the Saxon line and the right hand brigades closing on the second lot of field works.


At this point Chris decides to gamble one of his cavalry units in a flank charge on my infantry brigade, he needs three moves to reach us and throws a 10 on a D10 getting the moves he needs. Unfortunately though the Swedish pike see off the Grenadiers sending them into retreat.
Swedish move and now all of our units are charging home right along the line.
One of the Saxon units is forced to retreat and the reserve Swedes charge the gun, the flanking unit charges into the Saxon flank supported by the untouched cavalry unit. The gun is overrun but everywhere else the Saxons are able to hang on and even force back the unit in front of the Russian battalion.
To my right the first block of Swedes are in but again are held for the first round by the Cossack foot (rates as average for this game)
My cavalry charge the exposed Russian Horse Grenadiers forcing a break test which they pass, Unfortunately my own horse also need a break test and pull back from the engagement.


Chris now pushed his Dragoons forward, masking his gun but hoping I think to flank my foot, his reserve Cossack unit forms column planning to cross the bridge and hit my Swedes in flank there also. The melees continue to sway back and forth with my horse advancing on the dragoons now they mask the gun.
On the left two battalions of Saxons are broken, however the Swedish cavalry here are shaken so unable to take advantage and the untouched Swedish foot his horribly exposed in front of two battalion and a gun in line., my right hand unit is in a one sided fire fight with the Saxons whilst the unit that over ran the gun turn to fire into the flank f the Russian battalion who wisely pull back.
On the right my foot break the first unit of Cossacks whilst he Saxons hold my next unit at the barricades.
My cavalry charge and destroy the Dragoon unit, then withdraw so as not to have a flank full of grape from the gun.

The Saxon line is starting to buckle now, we charge the second unit of Cossacks and break them in open ground, Chris passes a brigade break test and his remaining unit here holds my foot but he is now outnumbered 4 to 1.

On the left my horse are unable to do anything as they are shaken but the foot are now either side of the Russian unit pouring in shot and the village has become untenable for the Saxons.
Chris accepts defeat gracefully and we have a chat about how tings have played. The rule amends really seem to be capturing what we wanted from the game. The saving on a 3 from the Swedes (despite my concerns it made them powerful) did keep them in the game, without it they could not have won I think. Thoroughly enjoyable and lovely to see my collection out again. Still several units to paint up for these and planning that much larger game later in the year on a 14 foot table with Chris Flowers and the Bramley Barners.

Hope you enjoyed our little game, see you all very soon.

Sunday 19 May 2019

Sikh Wars Sharp Practice AAR

We wanted another Sharp Practice as we were starting to get the hang of it. As my Sikh Wars project is progressing we decided this was an ideal opportunity to get them on table and try different troop types.
We would use deployment markers for the first time now we had the basics and the Sikhs would have a movable deployment point. Sikh deployment was the Ganesh statue whilst mark had an adobe house for the East India Company troops.
Chris Flowers and I commanded the Sikh forces. I had two units of regulars with a level 2 commander, a unit of 8 horse and a unit of 12 swords men all with level ones, Chris had the other two regulars and two irregular matchlocks all with level ones. The regulars had first fire and the sword and spear men had step out on one card. All the Sikhs were poor shots.

The East India company forces under Mark had two units of British regulars with crashing volley two cards and controlled volleys along with a level 3 commander (Flashman of all people) three units of Sepoys with a level 2 a unit of Dragoons with a level 2 and a light gun with a level two.

76 Sikhs vs 53 company troops but the company had a clear advantage in quality and a gun.
Move one and the Matchlock men and irregular cavalry deploy whilst the Dragoons, Bengal horse gun and Sepoys do the same and the movable marker is deployed 24 inches to the right in our woods.
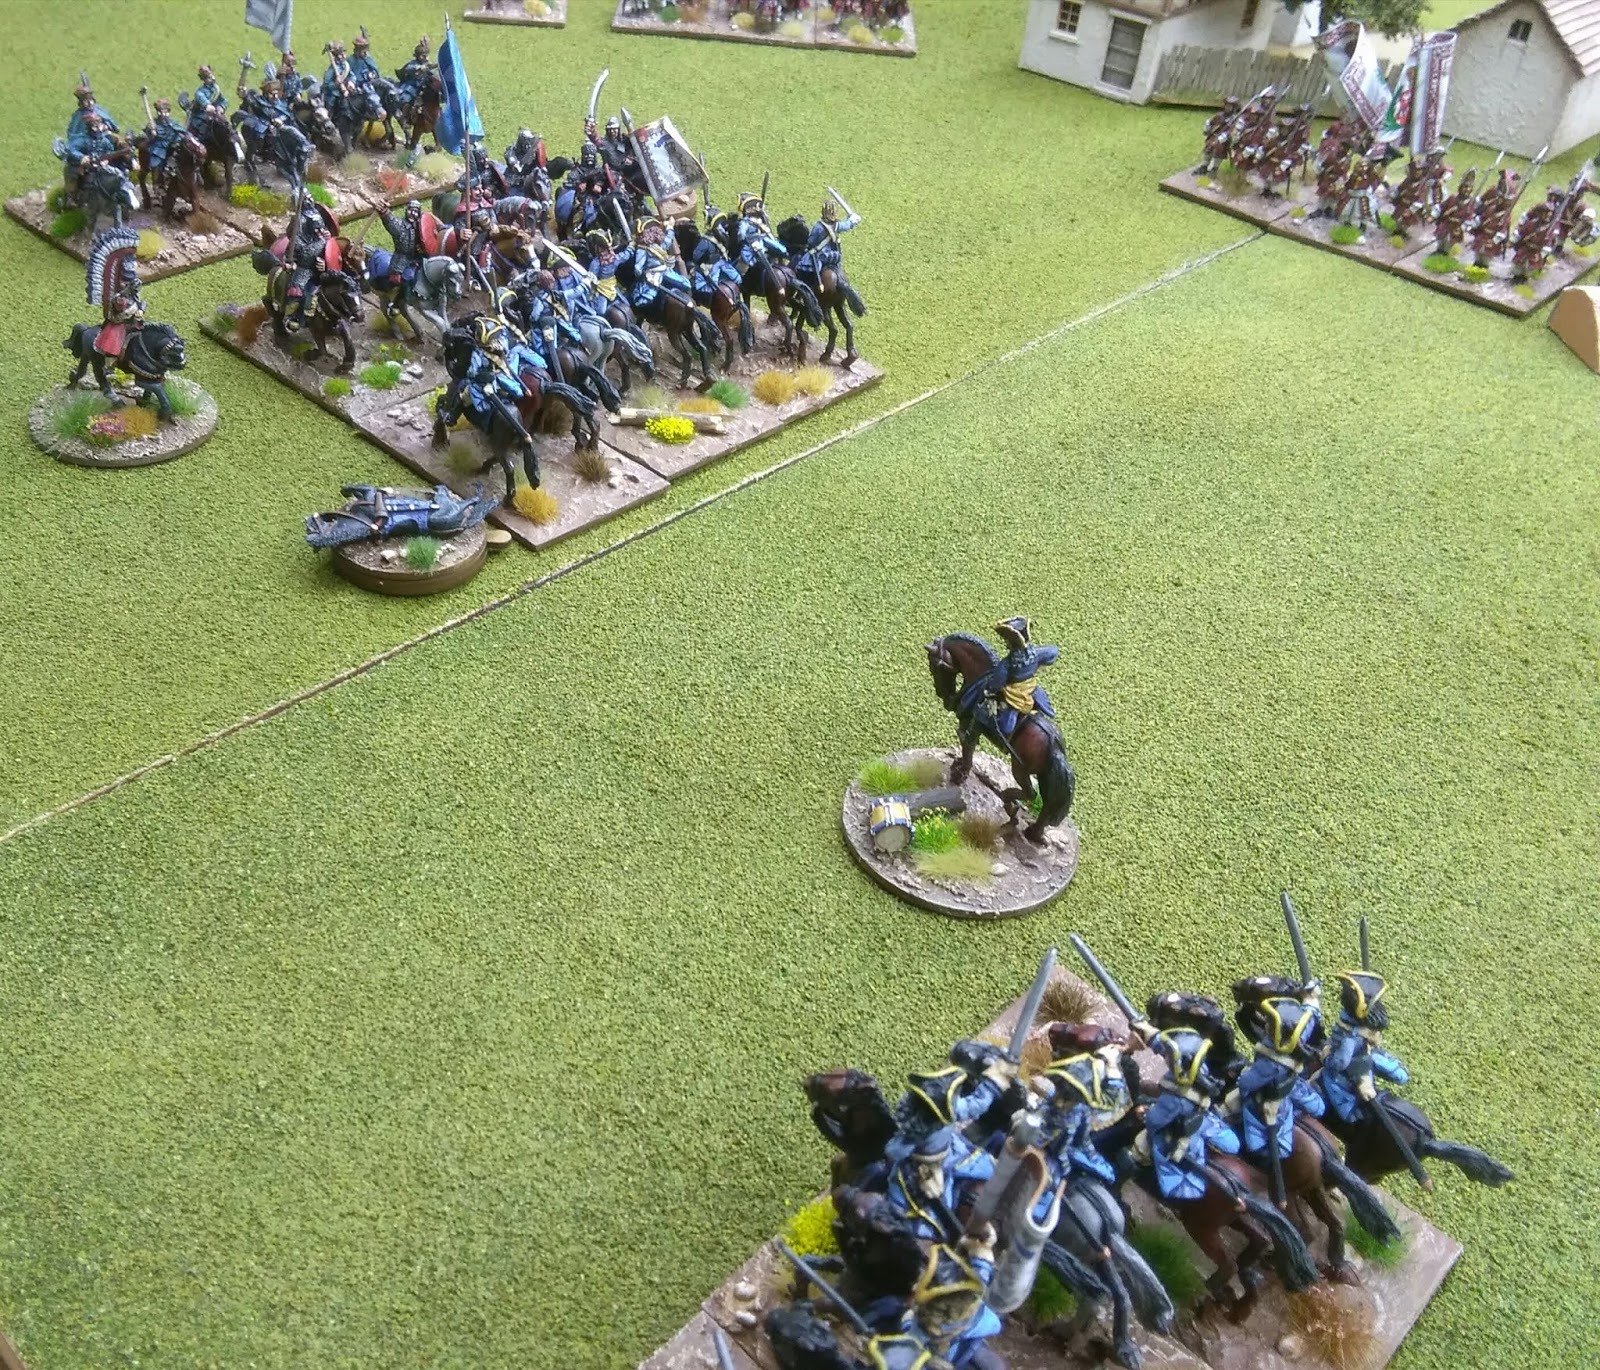
Next turn and almost straight away the cavalry are a each other. The British have the advantage of troop quality and a better commander, I have a slight advantage of moving more quickly as I was charging and they were trotting.
Not surprisingly I lose but have inflicted 4 casualties whilst receiving 5 and 4 shock, losing the melee I have to withdraw and I need to roll a "bad things" die having lost 5 casualties I need to roll a 6 for my commander or he is brown bread.
Happily I roll a six! Mark chuckles and shakes his head.
Next out Marks Dragoons charge again and destroy my cavalry but not before I inflict one more casualty on him leaving just three dragoons.
Meanwhile the gun opens up and Marks remarkable dice smash into Chris's Matchlock men inflicting 7 shock. The return volley whilst rolling great dice are all saved by Mark.

The final salvo of this turn and Marks Sikh regulars volley the remaining Dragoons and destroy them. I am reasonably content to have sacrificed my irregular cavalry to see off Marks Light Dragoons.
A second move for the deployment marker sees it a further 12 inches into the wood on the right flank and we now deploy the sword and spear unit still hidden in the wood, Chris's Sikh regulars move one and open a long range volley onto Marks Sepoys inflicting a couple of shock markers.
The return volley from the Sepoys does slightly more damage to Chris.

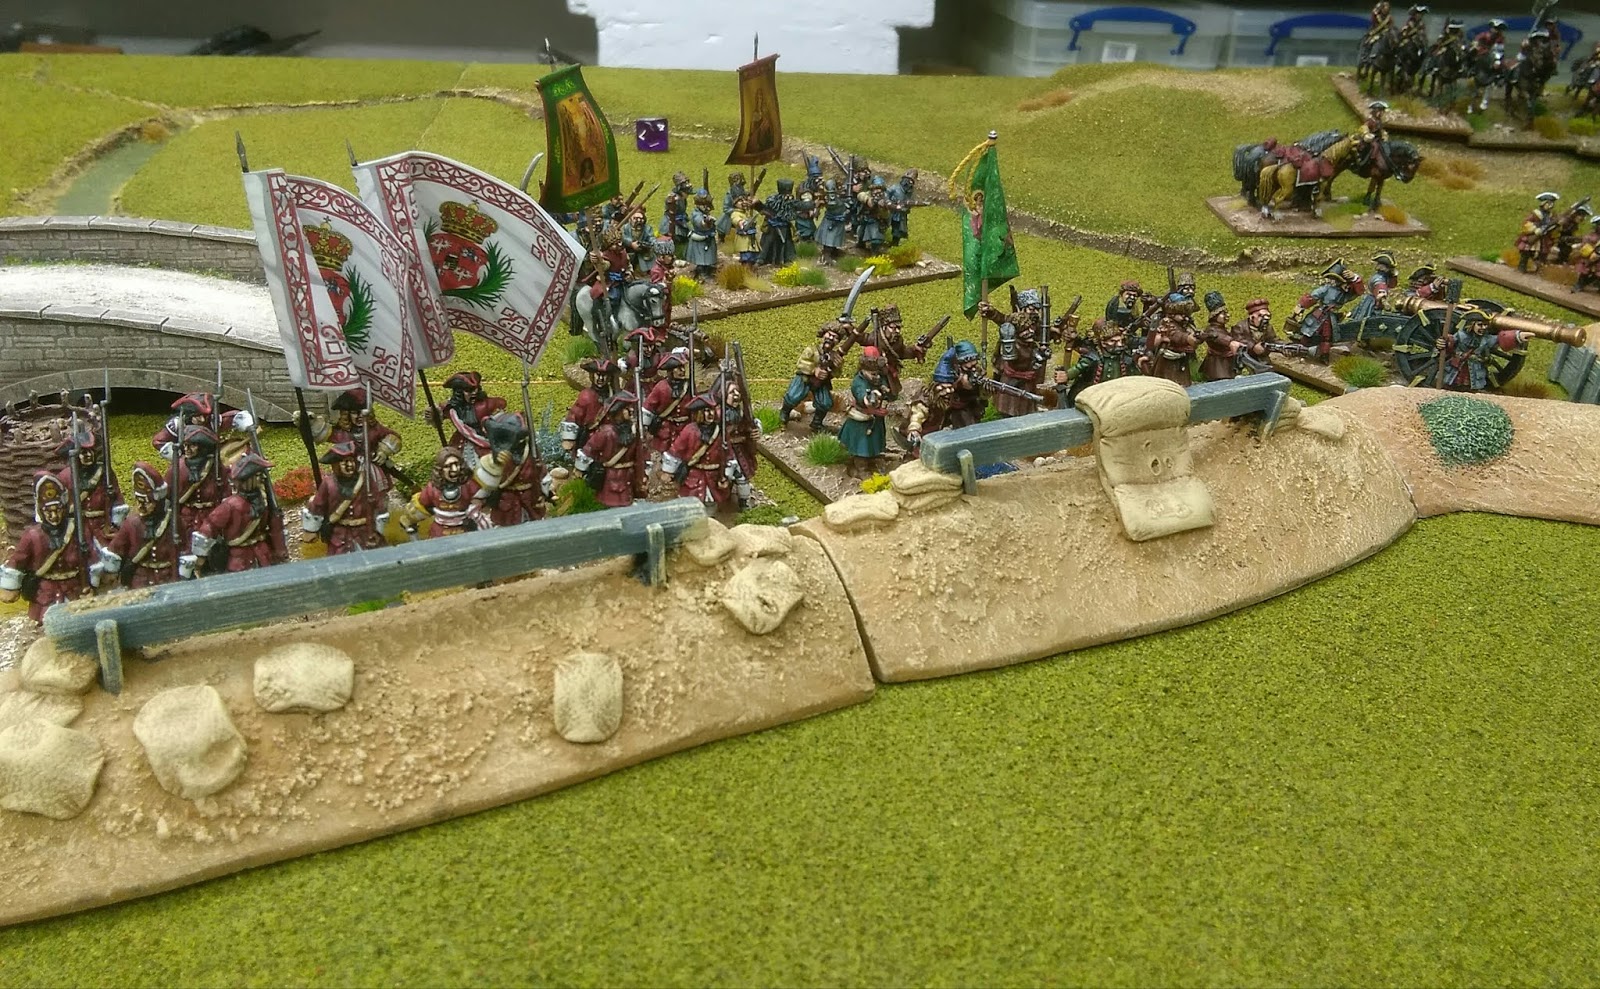
The Sword and Spear unit start moving to outflank to Company force, meanwhile Marks British Regulars finally enter table and take up a line to defend the hill against anything from the deployment marker in the woods.
The British deploy just in time as my Sikh regulars (the only Sikh unit with a decent commander) deploy and then move straight up to the edge of the wood., we are enfilading the Sepoys which would mean double shock when we fire so Mark sacrifices his firing this go to pull his line back a little and protect his troops. He ever so slightly block s a couple of the British troops in doing so.

My volley into him inflicts 3 casualties and 8 shock, the first volley is always devastating, but if he hadn't moved it would have been 16 shock!
The Matchlocks fire at the guns again and Mark saves all of the hits AGAIN!
No such luck for Chris as the gun inflicts more punishment on his irregulars who now have 4 dead and 8 shock.
Next go and my Sword and spear unit appear on Marks flank forcing him to wheel his British, both the British and Sepoys are out of arc so I take the opportunity to reload and advance closer to them.
Mark responds by pulling his Sepoys back. Chris has finally got two casualties on the gun and a minor respite as it has two actions of re-loading to do before it can fire again so no firing this go.


This Studio miniatures "Flashman" is a gorgeous figure, I have another one painted as Lancer officer with his horse shot from under him. Odd how the Studio figures range from absolutely fantastic, through nice to pretty awful, most of these last are discontinued now.
My regulars fire an enfiladed volley into Marks British inflicting a few casualties but not enough. My Sword and spear men have taken three moves, using a card for a bonus movement, onto the flank of the British where they cant fire on them.
A return volley from the Sepoys drops plenty of shock onto my guys.
With time nearly out Marks British regulars led by screaming Flashy himself charge my irregulars and break them. A bad roll from Chris also sees his matchlockmen run out of ammunition.
We now have 4 groups of damaged Sikh regulars left to attack 2 British and 3 Sepoy units along with a horse artillery gun defending a hill. Its a none starter, Chris and I accept defeat with quality winning out over numbers (and Marks awesome dice rolls)
Its been a massive boost for me to get the Sikh Wars collection on table, it's also been a really instructive run at the rules and a thoroughly enjoyable game, thank you very much Mr Shann for putting this on for us.

See you next time.