
 Posts
Posts


Back at Steves tonight and a third go at playing Bloody Backs rules with Chris Flowers as my opposition and Steve Umpiring.
The rules are free to download from Steve Jones https://paintingshed.blogspot.com/
Troops were already laid out for us as were the biscuits and all we had to do was deploy and snack.
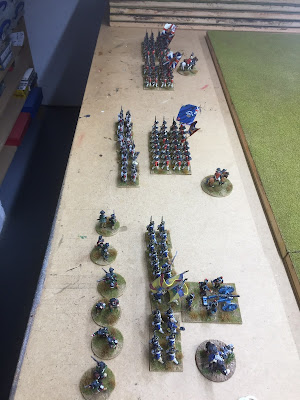
Facing me Chris had from left to right, a brigade of two large Continental regiments and a gun, a second briagde with Lees Legion and a company of rifles, then a third brigade with three regiments of militia.
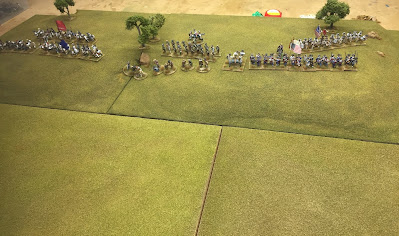
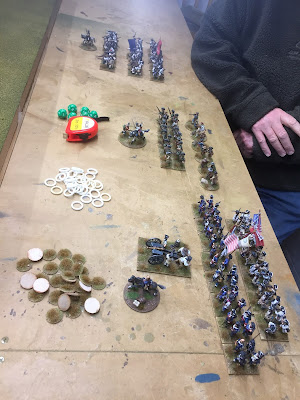 The Americans formed across the ridge to await the advance of the Crown forces.
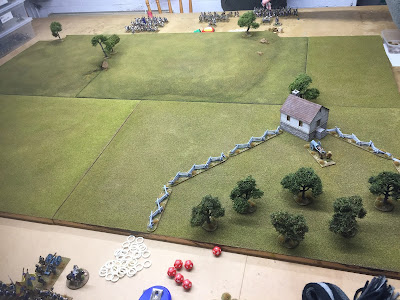
 The farm was just for pretty but the fence did restrict movement.
To remind you then each unit must roll for activation using 6 D12, Looking to roll lower than the number of your troop quality added to your commanders rating, so the better your toops and the better your commander te more flexible you become. For example a good British Battallion would be a 4 and a good commander also a 4 so you are looking for any D12 with an 8 or less. 1 or 2 dice gives a single action such move, fire, rally etc. 3,4 or 5 dice gives you 2 actions and a very rare all 6 rolled gives you three actions, we are trialing a rule that with all 3 actions you can fire twice, given how unlikely this is to happen we felt this a useful rule.
The militia were a level 2 but an average commander of 3 so rolling a 5 or lower and therefore harder to control. Militia with a poor commander are particularly difficult as they only get an action if you roll 4 or less.
 As I am attacking I roll first. all of my British and Jaegers leap forward 2 actions easily, however the Jagers are only a 3 and have an average commander so need to roll 6 or less, they only get the one action. Troops also move at different rates depending on how close order they are moving in. Light infantry skirmishers move 9 inches. the loose files of the British move 7 inches a turn but the close order Hessians are a much slower 5 inches. This compactness of formation also impacts how easy it is to score a hit, with skirmishers only being hit on the roll of a 3 but closer formed troops much easier to hit.
 This all seems very historically accurate and gives the game some real period flavour, it does take a little getting your head around though as each unit is firing, moving and hitting differently, especially when you fasctor in disorder and how many D12 they are rolling..
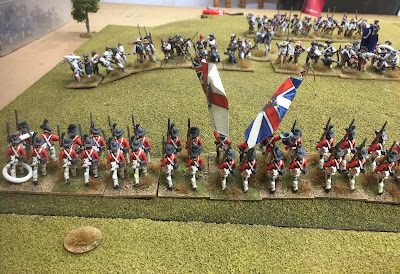
 On the left my two battalions of British regulars are quickly into firing range of the militia and open up with a long raneg volley. The rebels return fire and we begin to take casualties. Any hits are then turned into casualties or disorder. rolling a D12 again a 6 or less is a disorder, more is a casualty. Disorders are worse news than casualties in a away, you can take a maximum of three but each one removes a dice from your activation making it harder to do anything with your troops, once you hit the maximum of 3 any further disorders become casualties automtically. We marked casualties with a ring and disorders with a disc with a tuft on it as below. My right hand British unit has moved twice again and is swinging around the flank of the Continentals with my Grenadiers keeping the front unit busy with some well aimed voleys.
 Whilst Militia are not that easy to command they fire just as well as any other troops and our firefight quickly sees both sides accumalate disorder points, once you reach the maximum of three any further become casualties, more importantly though with the left hand brigade each unit only has 3 activation dice now so I am really unlikely to get enough activations to move or rally, the best I can do is stick with the firefight and hope for the best. At this point I probably should have tried to charge but I assumed the disorder would stop me.
 With the American rifles swinging around my flank the Highlanders take considerable punishment. I roll my activation dice and get nothing, thats a morale test which I fail and the highlanders flee through the gun position. The American troops are nearly all on 3 disorders but managing to keep getting an activation and stay in the fight. My Heassians keep managing a maximum of 1 activation, as the American gun keeps hitting them and leaving a disorder, I have spent the last 3 moves stationery taking the disorder off.

 The right of the line is in better shape, my Grenadiers have taken a lot of disorder but I am rolling well enough to remove it and keep them in the fight whilst my right hand unit has closed with the rebel flank and fired a devastating short range volley.

 They now charge home and the continental flank regiment is destroyed, I have however taken a number of casualties and automaically take 3 shock for winning the melee forcing me to halt and rally the disorders off with little chance to take advantage of my position in the rear of the Rebels.
 Like the formations on table the biscuit plate has taken a bit of a battering too.
 In the time I am able to reform, Lees legion have formed behind the continentals, I cant charge the rear of the continentals without exposing my flank to the legion.
 On the left my Highlanders have rallied and returned to the fray whilst Chris has moved the middle unit of Militia to support his crumbling left flank. The tide seems to be turning slightly.
 Finally I have the Hessians under control and march them forward into musketry range and I now have two units and the gun playing upon the remaining Continental regiment.
 The legion retires as my British advance and the combined musktry of the Grenadiers and Hessians all but destroys the remaining Continental unit.
 On my left one of the Militia units finally breaks under the pressure, the Patriots are in a difficlut spot with essentially three units of 7 gone. Its a British victory but just like many actions in the Southern Campaigns its a heavy cost for the British to win with many units decimated.

Another good game, Chris found the Americans much harder to control than the British which can be really frustrating. I cant help feeling this has a degree of historical accuracy.
I am sure we will have another game soon. Thanks for bearing with my rambles, see you soon.


