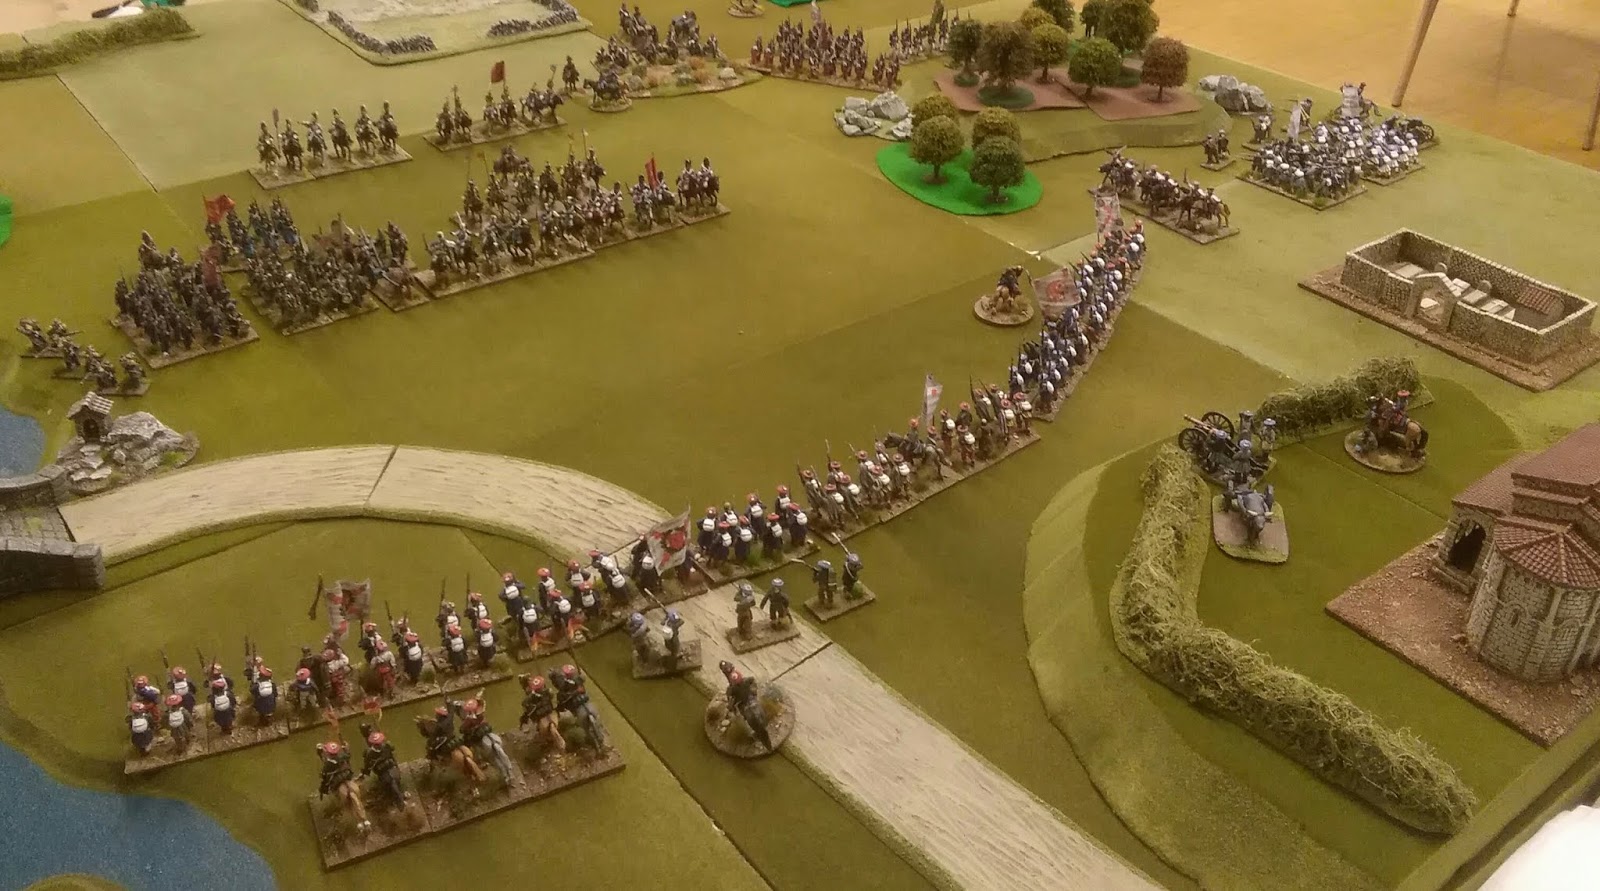
Chris Charlton and I had not played with the First Carlist War collection for months and so decided the clubs next Sunday game would be ideal. Both lots of figures were painted by me but Chris has carried out some lovely conversion work to make a unit of Guard Corracero's and an Isabelino rocket battery, both lovely.
I dont go often enough to the East Leeds Club but there is always a warm welcome and a stack of gear for us to use, the facilities in the fairly new building are spot on, anyone interested should visit our Facebook page at East Leeds Militaria Society Wargames Club.
Our game would be 6 feet by 8 feet with fairly closed terrain to either flank and some open ground in the centre.
The day did not start well as I left all the command figures and casualty markers at home and had to nip back to get them. On the up side the table was all set up when I returned and Chris had the kettle on.
I had left my figures out broken into brigades with Chris's box of biscuits in reserve. By the time I got back Chris would have organised these into the games forces and added his own figures to the totals.
Below is the Carlist force sorted into its Brigades. We diced for forces and Chris got the Carlists. They had slightly better troops and slightly nearer the objective but slightly less figures. The Carlists would have the tough fighters re-roll of one missed melee dice and also skirmisher rule for all the foot allowing them to pass through the difficult terrain better than my Isabelino's and also a bonus in musketry when deployed in skirmish order, not to mention one harder to hit. Chris had to be careful though not to be caught in skirmish order by a charging formed unit.
I had the Iabelino's and although slightly further to move and not quite the same quality I had the edge in Cavalry and got to fight with the Veteran French Foreign Legion.
The table was set up with a monastery on a hill and a road over a bridge slightly to one side of the table, this was the Carlist side who of course had slightly less troops. Each brigade was given an order at the start of the game and each side had a number of attributes to spend on their troops.
The Carlists had 6 and the Isabelino's 4. For my part I chose the Valiant attribute to allow four battalions to re-roll a save every turn. Chris mainly used steady and the Valencians sharpshooter so they had a a firing re-roll. The yellow coated Lancers on the Carlist left had ferocious charge. Thank goodness they never got to charge me!
In terms of rule modifications it was fairly light.
Movement and ranges reduced by one third due to table size.
Firing before moving.
Brigade break tests instead of automatically breaking.
Commander in Chief can make one command re-roll per turn.
The key objective for the game was control of both the bridge and the ford next to it. The forces for the game were as follows.
Isabelino Forces from right to left.
French Foreign Legion Brigade
2 x FFL Foot Battalions both Elite with first Fire
1 x Small Skirmish Screen
1 x FFL Lancer squadron with Lance rule
1 x FFL Mountain gun
Guards Brigade
3 x Guard Battalions, Grenadiers with Valiant rule
1 x Small Skirmish screen
1 x Rocket Battery (Love this)
Foot Brigade
3 x Foot (One small Militia)
1 x Small Skirmish Screen
1 x Field Gun
Cavalry Brigade
3 x Cavalry Squadrons, one with Lance
Cavalry Brigade
2 x Cavalry Squadrons
1 x Horse Artillery
Foot Brigade
1 x Guard Foot First fire and Valiant
1 x Light Infantry with Skirmish and Valiant
2 x Militia (small)
2 x Mountain guns
All deployed 12 inches in from the table edge.
Carlist Forces from left to right.
Brigade One
3 x Foot Battalions
1 x Squadron of Lancers
Brigade Two
3 x Foot Battalions
Brigade Three
2 x Foot Battalions (One small)
1 x Cavalry Squadron
1x Field gun emplaced by monastary
Brigade Four
2 x Foot both skirmishers
1 x Small Skirmish Screen
1 x Mountain Gun
Reserve Brigade Off Table
3 x Foot Battalions
1 x Field Gun
Like the Liberal troops the Carlists had an Elite unit in each Brigade. Again deployment was 12 inches in.
13 Liberal foot against 11 Carlist Foot, three Liberals small and one of the Carlists small.
6 Liberal Horse against 4 Carlist horse.
5 Liberal guns against 3 Carlist Guns.
I decided to put a solid lump of decent infantry on either flank with the strongest force on the right with the Legion and Guard brigades where they would be nearer the objectives. As the left had some very broken ground I put the only brigade there that had a battalion that can skirmish. The Cavalry in the middle where there was open ground for them but also where they can pin some of the Carlist foot. The last Brigade of foot to the right of centre aiming for one end of the Bridge and the last Brigade of two Horse in reserve in the centre.
Chris chose to put both his flank brigades in skirmish order to pass through and take advantage of the difficult terrain, I also assume this was to make the most of his musketry. Both sides were able to move forward at a moderate pace, although the Carlist right flank did struggle to get into the woods.
By move two the Carlists were across the river on my right and forming up to meet my advance with one brigade against two. The Legion cavalry launched a bold charge against the lead Carlists hoping to catch them in open order, unfortunately we stopped about a quarter inch short and took a nasty volley which although saved left the lancers dis-ordered in front of the Carlist foot, i.e unable to move at all and therefore about to get another volley and unable to free the space for the Isabelino foot. Not a promising start.
The Guards brigade advanced through the broken ground taking an ineffective volley from the Carlists whilst the skirmishers passed through the trees to add the weight of there fire to counter the Carlist Musketry.
In the centre the foot and horse advanced steadily and were unable to close to musketry range whilst on my left the Light infantry deployed into skirmish order to enter the woods at my side whilst the Carlists moved slowly through from their own side.
The Guards battalion lined out and mountain guns formed up next to the horse artillery to make a grand battery, or as near as could be achieved with the light guns used during the First Carlist war.
The Carlist centre meanwhile had formed a solid wall of troops from the woods on one flank right across to the river on the other flank, they were almost at the bridge too!
Back to the right flank and surviving another volley the Lancers remained dis-ordered and unable to move. However a blunder when rolling to remove the dis-order sees them given a charge order! They charge into the Carlists and then are broken, however have inflicted some serious casualties on the Carlist foot. To their right the next unit of Carlists is charged by three columns from the Guards brigade, a quick melee sees them broken and removed from the table. In the follow up from that the Grenadiers form on the flank of the first Carlist unit ready to volley and then charge it next go.


On the other flank the Carlists now occupy the majority of the wooded hill and are engaged in a fire fight with my Light Infantry, Guards and Mountain Guns which gradually begin the wear them down. Chris has decided not to fire his Valencians and save their first fire volley for Cavalry advancing across his front, the Carlist mountain gun is in the wood so only one battalion of Portuguese deserters is returning fire along with the small Carlist skirmish screen. In the centre the Isabelino foot advance into musketry range but remain in column ready to charge the Carlsist whilst my Cavalry Brigade bravely (Foolishly?) thunder forward at the bristling line of Carlist bayonets. The Guard Horse Grenadiers bounce off and retire behind the line lancers whilst the Princessa Hussars win their melee but the Carlist foot pass their morale and hold their ground.


In the centre the Isabelinos start to get the better of the infantry melees but the Princessa Hussars are destroyed and the line light cavalry volleyed and dis-ordered preventing them from either charging or pulling back. On the right the Provincial Guard Grenadiers prepare to charge the Carlists still in skirmish order first giving them a volley supported by a volley from the Legionaires. This is enough to force another break test which they fail, this also forces a break test on the remnants of their brigade which also fails and is removed from table.
On the left flank a volley into the Portuguese takes them dis-ordered, Chris rolls to remove this and gets a blunder forcing him to charge and driving the Light Infantry out of the wood, Another volley and two shots into the Valencians also sees them disordered and starting to take casualties.
In the centre two battalions of Carlists now break and although Chris passes his brigade morale test things are looking desperate around the Bridge. At this stage his fresh brigade of supports marches on just behind the bridge intent on crossing the river to hold the far bank from the Guards and Legionaires.
The Isabelino Line charges into the flank of the remaining battalion of Navarese troops, but made of stern stuff they are forced back but leave the Isabelinos shaken in their wake and unable to follow up.
The Carlist lancers charge the Isabelino marines next to the bridge to pin them but are unable to get close enough then driven back shaken form a fine volley. But the marines are also shaken and unable to take advantage of their position.
On the left flank the Isabelinos are now able to put two volleys into the Portuguese who are already both shaken and dis-ordered and now break taking the rest of the Brigade with them on a break test. Both Carlist flanks are now wide open.
In the centre the Isabelinos are at last able to get their reserve cavalry moving, the Carlist Hussars D-Arlaban charge the dis-ordered light cavalry in flank and beak them but the Liberal reserves charge them in turn forcing them back. The Guards and Militia on the left flank form column and begin to advance whilst the light infantry press quickly through the wood into the rear of the Carlist position.
On the right the Legion and Guards brigade have formed column and march to the bridge to meet the threat of the Carlist reserve, arriving just in time. Behind them the rocket battery plods along on its mules having set up and dismantled three times so far and not got a shot in.
The Carlist Hussars charge the Isabelino reserve Cavalry and are beaten. From behind them the Carlist Grenadiers wheel and march forward to take on the Light Infantry, charged they do little with their closing fire and are pushed back into the woods where the Grenadiers cant follow them.
With both flanks and most of the centre disintegrating its down to the Carlist reserve to pull victory from the Jaws of defeat as they advance on two brigades of Isabelinos on the far bank of the river. All around us the club is packing up but Chris and I are determined to get to a result.
three battalions of Carlist foot enter the stream and the gun unlimbers. A volley from the Legionaires dis-orders the first and the second fails to charge home. The Isabelinos have now lined out across the bank and the Legion skirmishers are on the flank of the gun. With the Bridge and ford firmly in control of the Isabelinos and few troops left for a further advance the Carlists accept defeat.
You can just see the rocket troop set up on the bridge and ready to fire. finally in a position to launch its deadly (or not) load the game is over! Mule rolls its eyes at the waste of effort. Just so you can see the superb job Chris did on his conversion job the rocket troop is below in all its un-fired glory.
An absolutely cracking game, thank you Chris, I always thoroughly enjoy gaming with Chris. Wonderful to see these figures on table after such a long break and Chris is now tempted to produce another unit of converted figures for Isabelino Cavalry.
Another victory too for Black Powder rules, this sort of game suits them well with relatively little in the way of changes.
No other games for a week or two so the next couple of posts will probably be updates on the Irish project.
Thanks for reading and keep your powder dry until next time.

 Posts
Posts