Friday, 15 March 2019

The Toenail of San Sebastian part one.

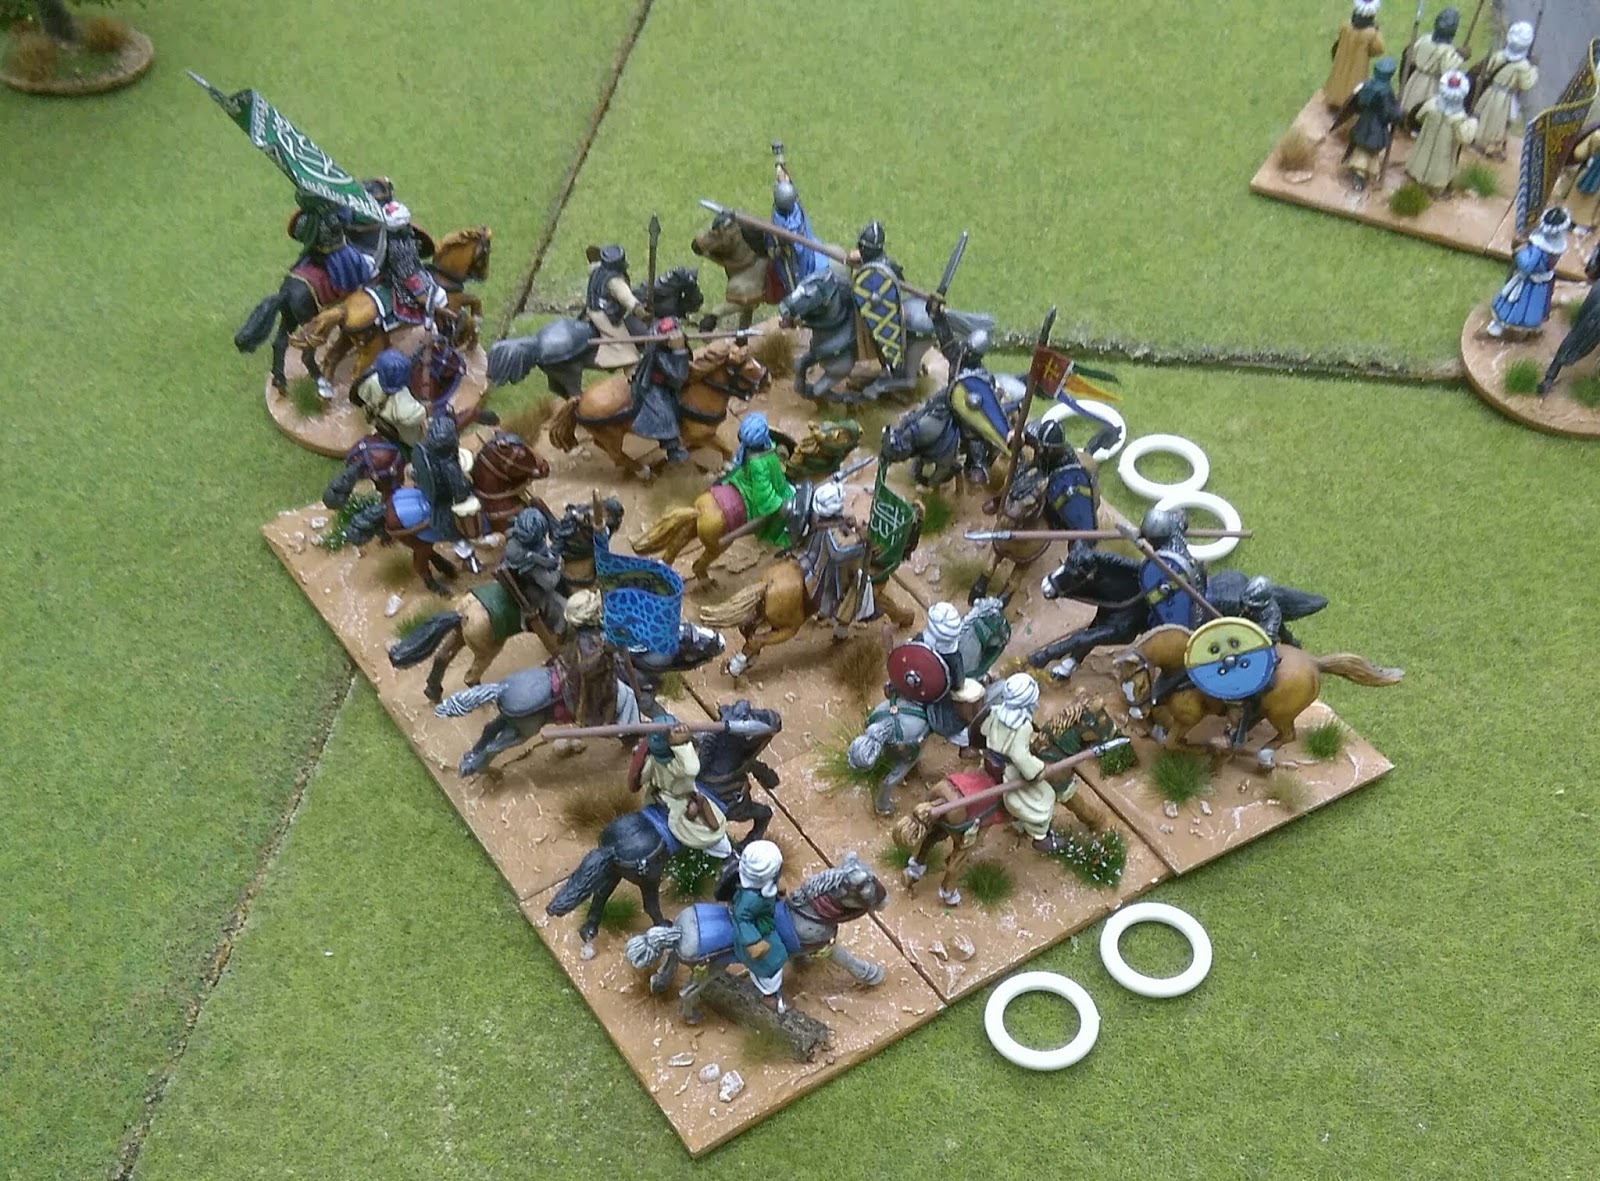
Chum Chris Flowers asked me to put on an El Cid game for our next Saturday all day game using Hail Caesar, I was halfway through organising the game when Steve Shann asked if I fancied doing an El Cid Hail Caesar for our Thursday night game, initially I thought it might be overkill and then I thought why not have a smaller game on Thursday that links into the Saturday game. Genius!

There would be three players and me as the Umpire so three forces, why not make is a three way encounter with each player vying to beat the other two.

So for the purposes of our encounter a small troop of men are carrying the most holy of relics, the Toenail of San Sebastian, to the Monastery of the same name. There they intend to unfurl the gonfallon of San Sebastian in the presence of the holy relic and then lead the Christian army into battle against the Almoravid invaders and drive them from the land.

Well thats the plan but they have to get it there first.

Realising they are being pursued by a force of Moors led by the Emir of Zaragossa they have sent for reinforcements, the Count of Asturias is riding to support them at the head of his household knights, however the Mercenary Captain the Bastard of Guyes has been paid by the Almoravid leader Ben Yusuf to capture the relic for him and deny it to the Chrisitans. Should be interesting.

Each player has a sheet detailing his forces and their abilities, they also have their individual objectives laid out.
Chris Flowers plays the flamboyant Emir of Zaragossa, he is well provided with lights cavalry and medium infantry but does not have much to stand up to the Christian Knights.

1 Unit Heavy Cavalry
1 Unit Horse Archers with Parthian shot rule
6 Units Berber light Cavalry
5 Units Berber medium Foot with long spears rule
3 units of Berber light archers

He must slaughter as many Christian's as he can and stop the relic reaching the monastery.

The devout Count of Asturias is played by Steve Shann, he commands the small escort trapped inside a ruined fort and heavily armed reinforcement of cavalry. He must ensure that the relic is escorted safely to the monastery of San Sebastian.

2 Medium infantry in the fort
1 archers in the fort
1 Crossbows in the fort
 6 units of Mounted Knights with lance special rule
2 units of light horse
2 units of heavy infantry

The bastard of Guyes, played by Mark Stimpson, has been paid by the leader of the Almoravids, Ben Yusuf, to capture the relic, his only interest is money and loosing as few of his professionals as possible. His force consists of:

6 Units of Knights with lance special rule
2 units of light horse
1 unit of horse archers
3 units of heavy foot
1 unit of crossbows
Each army will approach from a different corer of the table and each commander rolled a D6 to see the order in which they would move. Steve rolled a 5 and went first, followed by Mark and then Chris.
The initial moves see part of Steves mounted Knights move forward but the bulk of his force refuse to move at all, Mark gets good movement but is playing it cagey and moves his force just a few inches forward. Chris likewise gets a steady movement and closes his foot towards the ruined fort whilst half his light cavalry move to block Steve and the other half does nothing at all having failed a command roll.

Move 2 and again just the one group of 3 Asturian Knights moving forward, the mercenaries remain cautious and move forward slowly, Chris now manages to get his Horse archers and light archer skirmishers into range and inflicts the first casualties of the day as he creeps nearer to the Christians.


We are now in charge range and Steves Asturian Knights charge the light cavalry, the horse archers decide to evade, fail their order and are caught and destroyed, Steve bounces on to the first unit of Berber light horse and an immediate melee sees a draw! Well done on holding the line Chris. The Asturian foot next to the fort charge the nearest unit of archers and see them off.
At this point Steve and Mark hatch a plot to gang up on the Moors and divide the spoils at the end of the game, I have seen both of them do this before and it never ends Will as they usually betray each other at the end. The mercenary cavalry sweep around the fort but their foot are left to cover the flank facing the Asturians, there might be a deal but there is not a lot of trust between these two.


Next go and Chris has some amazing dice to stay in the game and charges and after beating a first unit of Asturian Knights bounces straight on to a unit of light cavalry, meanwhile his Berber foot press into the ruined fort and charge the Asturian foot outside the walls and drive them back.

Marks cavalry have now appeared on the flank of the Berber foot just as he is about to charge the fort. The first unit have been driven off by spear chucking and the cavalry are now all over their open left flank.
Throwing to see if his reserve can save the day and charge the Mercenary horse Chris gets an amazing three moves and charges 26 half inches (maximum is 27) the only unit of light horse is his target and they decide to take the charge at the halt with the two units of support and chuck spears at the Moors as they close. Chris saves all his casualties and inflicts just one on Mark which forces a break test and half the mercenary horse are forced to retire a full move.

On the other flank the melees of horse have reached critical point and the light horse finally loose their uneven battle with armoured knights, two more units of Berbers are destroyed forcing a divisional break test, a role of 3 on two dice sees all of the Moorish cavalry flee the table. Its the end for the Moors and the Emir of Zaragossa decides that discretion is the better part of valour and rides after his fleeing cavalry. To be fair once the two forces of knights join forces he stood little chance.

With the remnants of the Emirs force fleeing the table it is down to the Count and  The bastard to divide the spoils, there are two donkeys but only one contains the relic, the Count being in possession of both the fort and the Donkeys has first choice and gets lucky, the relic is safely in the hands of the Christians and on its way to the Monastery of San Sebastian.

The scene is now set for the big battle outside the walls of the monastery on Saturday. Will the Count Win through with the Toenail of San Sebastian? Will the Moors already have taken the Monastery and put all to the sword? Will it be tomato soup for lunch? All will be revealed. See you soon.

Saturday, 9 March 2019

The Irish Shotte

The biggest gap for my Elizabethan Irish is the Shotte. I use the mispelled Elizabethan version on purpose just because I am a bit perverse like that.

I have the Perrys pack of shotte which are lovely but with too early firearms really. It doesnt bother me too much but I do want another six with later muskets and calivers.

With that in mind it looks like conversions might be in order.

The first figure I am looking at is the Perry's standard bearer, with an open hand at just the right height its an easy job to put a musket in there instead of a flag pole. The next one is slightly harder. One of the leader figures from the command pack is slightly open handed on the left. I might have been able to cut up a metal musket slightly to fit in this hand but decided it would be easier to use one of the spare parts I have from the Warlord plasic ECW musketeers.

For this figure I trimmed away both arms and also the right hand on the butt of the musket using the remaining hand to replce the metal hand cut away from the Perry figure. as this has a coil of match cord around the wrist it disguises the join quite well.

I think the end result on these two is pretty good. Any excuse to get the fortified manor out again.


I now started to look at the other figures to see which ones might lend themselves to a minor bit of surgery. The below Crusader Kern was one of those I think was most suited. With this one I can either trim away the bow, open up the hand and then have a musket resting on the floor in a relaxed pose. Alternatively I can use the plastic ones trimmed back so just a hand remains on the butt of the musket and do a hand swap, I think either would look OK. Now I only have 13 archers and need 12 so only one of these two guys can be sacrificed to the knife. Unless I replace one of them with a piper?
This next figure is a Dark Age Pict from Westwind with his hand open for a spear, whilst he doesnt have the flowing sleaves of many of my Irish I think he will look OK with his caliver.
So here are the two Crusader Kern with Bows and hands gone and replaced by new ones. The rested musket on the left is metal with an open plastic hand I pinched from a spare sprue and the one on the right is  a plastic Warlord ECW musket with the arms and the left hand trimmed away. They dont look much here but I can see them taking shape.
 Once I have slapped a bit of paint on I think they look pretty good to be honest. With the others this will give me 11 so near enough a unit or two units of forlorn hope. Not enough but a fair start.


Chum Chris Charlton also picked up some Irish from an old Essex range which I think I can use, not entirely sure about the wicker shield on the top two but the musketeers and officer should be a good fit.So I now have slightly more than required.
The first of the Perry kern with firearms are also over the line, these are lovely, the one with the helmet is a head swap using a Redoubt ECW helmeted head. Also the first of the musket armed troops from Essex is complete too, not so sure I have his jacket right, not sure if its supposed to be a padded leather jerkin or not, but still it looks OK.

I also picked up a bunch of Dutch militia from TAG which are a good fit for the English. The rested muskets being particularly useful as I only had 3 of these to start with.

The English had heavy muskets on rests and also units with lighter calivers. Whilst the muskets has more stopping power and great range they slowed the English down making them less manouvreable.  The Irish used Calivers only and were adept at skirmishing with them. The English also used the Calivers to Skirmish but it took a number of years for them to become as effective as the Irish.
These are really lovely figures, they fit reasonably well with the Foundry range but are slghtly smaller, they are too small to sit in the same unit as the Graven Images figures though.
This is probably one of my least favourite of the Graven Images English, an officer in a rather odd looking hat.
You can really see the difference with this guy against the TAG musketeers. He was already bigger but the hat and the armour exagerates the size difference.
I also finished these two books, the Celtic Warriors has some lovely colour plates for Elizabethan Ireland from the master Angus McBride and the Nine Years War is a really interesting read that convinced me that the earlier period is probably more suited to the game I want. Gallowglass and Kern with Darts, bows and double handed axes are much more fun than two lots of pike and shot. Something around the time of the Armada might be perfect, although the earlier Desmond Rebellion would also suit, so I can do something fairly transitional and maybe even add a unit of English Longbows into the mix.
So this little lot takes me a bit closer to enough for a game. 3 more Musketeers and 3 more archers will be 6 units completed for the Irish and the English are already well on their way. Watch this space for further updates.

Sunday, 24 February 2019

1812 Workbench

Coming off the workbench are mainly French for the 1812 retreat with a few Russians too. I am over in York with the basing department this evening off to watch the Blues Brothers tribute so thought I might get soem shots before I take them over for the first stage of basing.

So firstly the Russians, these are hte first of my line infantry, two more started so a group of 8 almost complete.
I have a dozen French complete, real mix of figures, mainly these are Perry miniatures retreat from Moscow but I wanted to mix in a few more figures so I have a bunch of old Foundry French and a sprue of Warlord figures all in great coats. I like the mix.
I am using a real mix of colour schemes, I want these to look particularly scruffyand mixing the greatcoat colours and cloaks/bedding/blankets etc helps with that.
To add to the scruffy look I am also being careful to not add these in ranks onto the base.
I intend to add an officer to the base with the eagle, but still a couple more figures to finish before I have a battalion for Black Powder. One officer and one more trooper should do it.
I also finished off three command figures, the peasant with the Pistol will be a level one leader for a unit of Russian peasent skirmishers. The middle guy an officer to lead the French and the Seargent on the end a Level one for Frenhc skirmishers.
And here they all are together before I send them to York for basing.

So just a  few more to do and we can play without needing to pinch figures from Steve and Chris. A couple more French and Russians then I can make start on French Cavalry.

Carlist Debacle Battle Report

We decided Carlists might present a nice change for our latest battle, we also wanted to see if the rule amends we introduced translated to other conflicts so would be using all the various changes too.

Steve set the game up, I was Carlist with three Brigades of 3 Foot and a couple of guns on a ridge line and a further battalion in a village forward of my line supported by three units of cavalry.

The Isabelinos under Steve and Mark initially had two brigades of 4 battalions each and a brigade of four cavalry with a further brigade of 4 arriving on move 2. The troops were all pretty average except the French Foreign Legion having much better stats and a brigade of Carlists with much lower stats.

The ridge being a really strong position should be a tough nut for the Isabelino's, however in my defence it had been a long day!

I deployed my Cavalry either side of the village wihtout much thought of what the Isabelinos had done, Leaving me with one unit to the left and a brigade of 4 cavalry opposite it!

So I decided that I needed to shift one of the cavalry over to the left and the other would sneakily ride over to the far right flank in order to harass the flank of the Isabelino's and give them some food for thought.

Unfortunately the Isabelino's got some good movement, more importantly I was so not with it I actually forgot to move anything at all! Oh dear, the theme for the night had started.
Mark was playing with his own British Legion and my French Foreign Legionaires. Steve had my Isabelino Cavalry and the Isabelino Guard infantry.


Before you knew it the French were in range of the village, however it was only when they started firing at me that I realised I had not been firing back, seriously where was my head tonight. I had also forgotten to move the cavalry again. Who needs blunders when you are able to make this much of a mess yourself.
As the cavalry closed in on my right flank I threw my Carlist lancers at them in a vain charge to slow them down.
This ended in an inevitable defeat and my first unit was out of the game, two moves too late I threw my other lancers out to the right flank only to have them shot up and disordered, the third unit was also shot and disordered so neither of these was going to be able to move as the isabelino's moved into short range.

The FFL had saving throws on a 3 so I wasnt able to inflict any casualties as they closed in, meanwhile my saving throws were pretty poor and the casualties int he village began to mount with two FFL battalions, a skirmish screen and a gun throwing short range fire into them.
The Isabelino's were now closing in all around me, a further volley into the village forces a break test and the defenders retreat out of the village, the FFL move in and with the bonus of cover are now able to save any casualties on anything but the roll of a 1. whats left of my cavalry have been fired at every go and disordered every go, they are now also having to take a break test every go and steadily pushed back. My artillery is having little impact and all I ca really do now is wait for the noose to close.
Finally with a move where my troops are not disordered I am able to pull back the battalion form the village and one of the cavalry units whilst the other charges the British rifles to try and buy some time, The closing fire forces a break tests and inevitably the cavalry breaks.
On the left Steves four battalions close with my three poor battalions. The initial rounds of fire and hand to hand combat see the first two units of Isabelino's pushed back, however the reserve units then march forward and whilst I hold one the other forces a break test on my middle unit which withdraws, the Isabelino unit uses a sweeping advance to follow up and the Carlist unit breaks.

On the right Marks British close in and a brigade level firefight begins to tin the ranks on both sides.

It was about this time that Steve and Mark paused as I finished my go and said "over to you" they looked at each other and Steve said "Are you sure you dont want to do any firing?" Good grief I had fired my guns and skirmishers and literally forgotten to fire my whole front line of infantry!

Being good sports they allowed me to do my firing out of sequence.
The Isabelinos are now behind my line and I am trying to pull my reserves across to refuse my flank, I pull the badly mauled right flank unit back to the very edge of the table.

Finally I began to have some impact on the enemy as the first battalion of British breaks.
However on the left the Isabelinos have closed a gun, battalion and skirmish screen on the isolated far right unit and after a short fire fight it break, this forces a brigade break test and my third battalion also breaks. Mark advances the Legion on my centre and a roll of casualty removals by his generals sees four sixes in a row and his battalions are all suddenly in very good shape against my badly mauled force.

A volley from Steve and the unit that had retreated from the village, forced to fill the flank of the force, suddenly has to take a break test and now breaks leaving yet another hole in my line..
The units of both sides are now almost toe to toe and the Isabelinos are gearing up for a final push, I have broken one unit of British but they have broken six of my units and the rest are all very badly mauled. There is no way I can rescue this situation and I finally accept defeat.
An interesting game, I doubt I gave my opponents much of a game on this occasion, sorry fellas, but it was ice to get this very colourful collection on table