I was invited recently to Castle Riley to play in a refight of Monmouth Courthouse over a few sittings. Ken the "Yarkshire Gamer" has set up a nice game in 28mm using British Grenadier and for the most part the orders of battle from the scenario book.
I have played British Grenadier before with chums Dave and Howard and had mixed feelings.Whilst they gave a lovely feel for the period they are extremely slow. It takes some time to get any sort of result and moving can be quite painful on big tables with lots of troops. They do however give a real flavour for the period and so I was pleased to be able to give them another go with a group who use them regularly.
The table was set up with an entry road on the very far right flank for each force down which all troops for both sides would need to march. A small village on the British far left held a rearguard and the baggage train.
For those of you that dont know Monmouth Courthouse was fought on a blistering hot day in New Jersey when the Continental advance guard court up with the British rearguard and baggage. General Clinton turned his British Army around to save the baggage and rearguard and both sides fed reinforcements into a battle neither had particularly expected. The heat apparantly cause far more fatalities than the enemy action for both sides so would definately be a factor.
In British Grenadier units pick up DP's or disruption points for various actions such as crossing rivers and rolling poorly on movement dice as well as from enemy fire. Once a unit has 3 DP's they then start to take actual casualties and require morale tests. So as part of this we had the wooded areas causing a DP each move a unit went through them. A fence another DP, a river 2 DP's. You will see from the pictures that the Continentals initial deployment has them passing through a wood and river before sighting the British and so picking up 3 DP's immediatly, add to this the potential to take up to 2 DP's from your movement dice if you are particularly unlucky and you can see how this goes reflecting the impact of the heat stroke on the day.
Lonnie and I had the Continentals whilst Steve faced us with the Light Infantry of the rearguard and Ken led the British regulars counter-marching back to save the baggage and rearguard.
Initial deployment saw the Continentals with two brigades totalling 5 battalions and 3 guns. The British at this point were hidden and so numbers were unknown. I will share the Orders of Battle at the end to reflect the fact that we actually didnt know what the OOB were until well into day 2. Only Ken had that information to start with.
I deployed with one brigade to the left front of the village and Lonnie with the other to the right front, As I was able to use the road I was in position much earlier, Lonnie needing to stop to rally DP's off his units before advancing again.
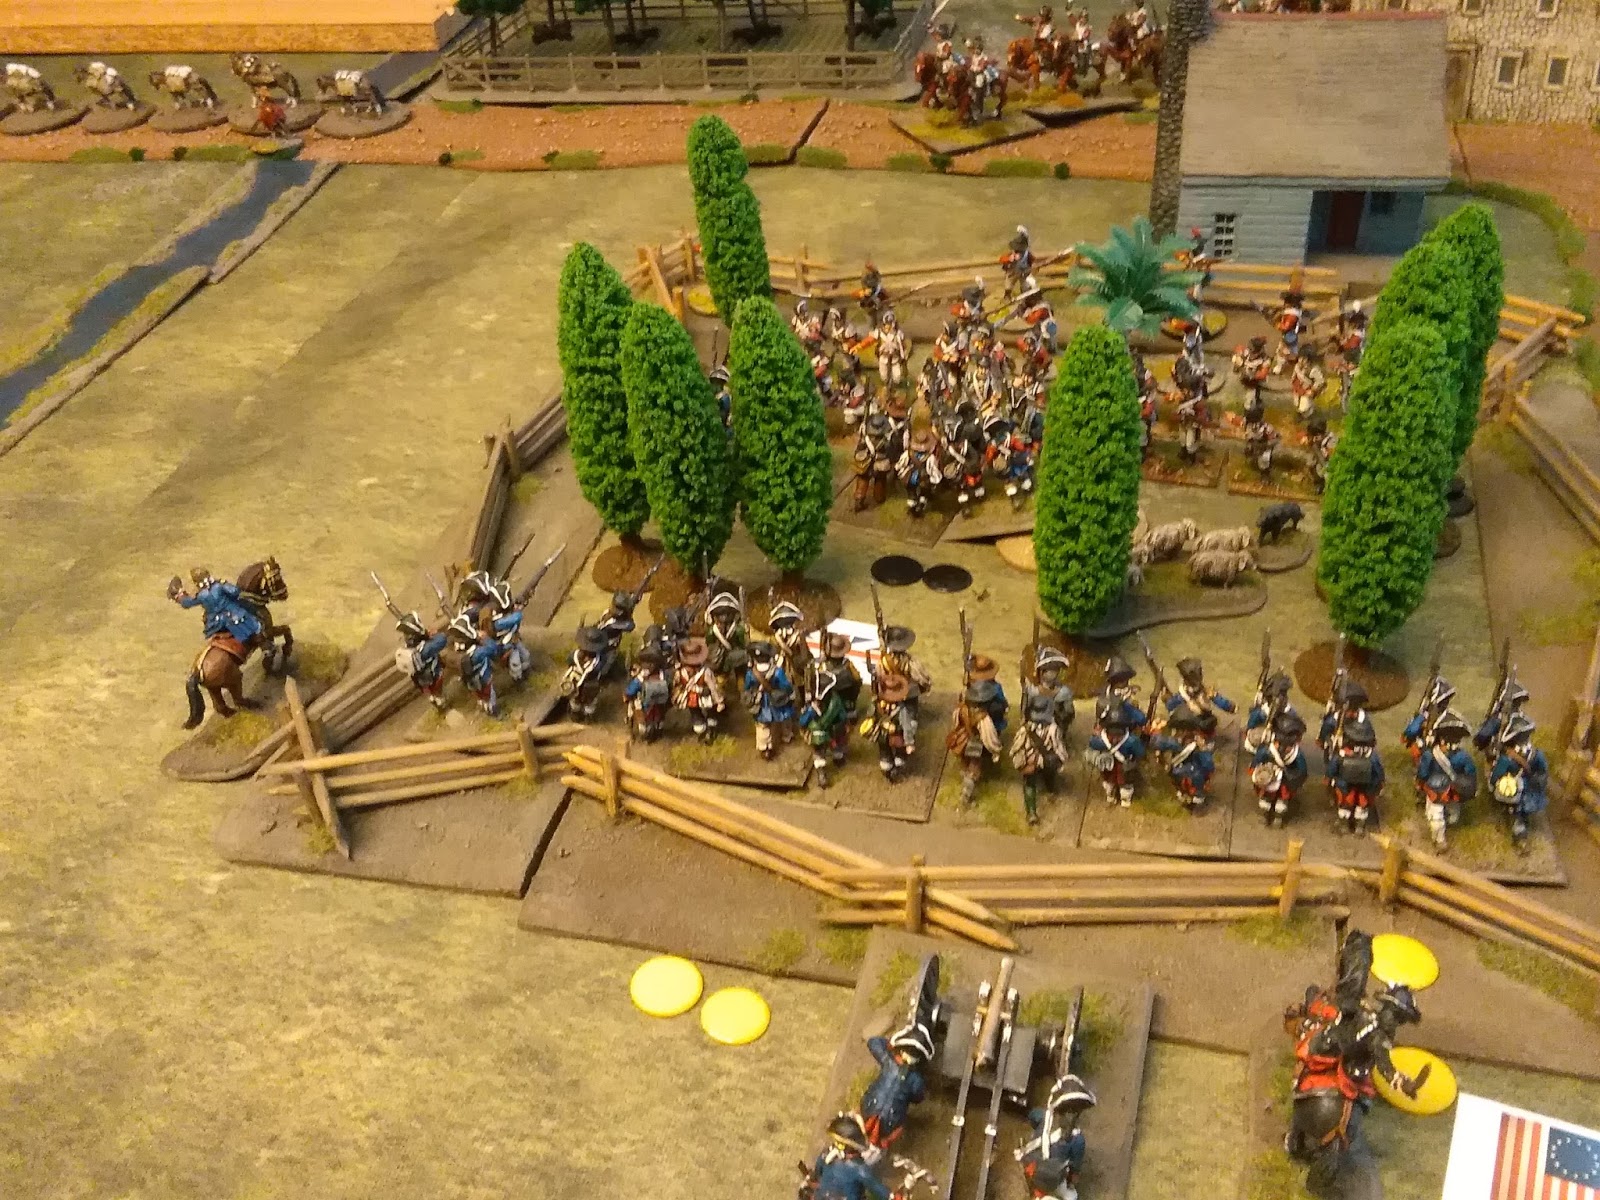
By turn three we were under fire from the edge of the orchard from a large unit of skirmishers. Eventually after some rounds of ineffective fire we charged the skirmishers and pushed them back behind the battalion of light infantry that now revealed itself in the middle of the orchard.
The palm tree in the orchard is one of Kens little jokes, I am sure he will explain more in his own write up on his blog http://yarkshiregamer.blogspot.co.uk/
Behind us the rest of the Division was slowly marching on whilst over to the British extreme right a brigade of Elite Grenadiers somewhat worringly made its appearence. My first battalion now charged the British and surprisingly forced them back. Both sides taking disruptions but no casualties.
Whilst all this was goingon a squadron of British Light Dragoons appeared from behind the village. Whilst this was a worrying development given our lack of horse, I also new that Ken had only finished painting and basing the figures that morning, so if they ran true to form for new units they would be seen off fairly quickly. Well that was the plan anyway.
As I got my other two battalions of foot moving my first battalion followed up on the light nbattalion it had forced back. Numbers were to tell now however and the exposed continentals were soon seen off and eventually routed from table.
Over to our left I really didnt like the look of those very large elite battalion of grenadiers and behind those the advance guard of the British were forming line and preparing to take the fight to us.
Steve decided to outflank my gun with his light dragoons, intending to turn them and charge into my exposed flanks. unfortunately his unit was still in arc at point blank range when it stopped and quickly took serious casualties, The first round of firing stopped them dead and inflicted 3 disorders and a casualty, the second round of firing caused 4 more casualties and the drgaoons broke and left the table. Sorry Ken, they did look nice though!
Meanwhile the Continentals are now almost at the orchard and Hessians are closign in on the orchard from the other side with some pretty up to date transport seemingly sneaked in!
The race to occupy the orchard is still pretty even but the quality of the British far outweighs the Continentals.
In the village Lonnie has now taken over both brigades, his guns are in range of the Queens Rangers Loyalist foot and one of his battalions has charged the first houses driving out the Queens Rangers skirmishers with minimal casualties.
In the orchard a surprisingly ineffective firefight has developed with very few casualties on either side.
Both sides begin to deploy in and around the large orchard whilst the British Guards brigade follows the Grenadiers on table.
So at this point the first day of the game ended with the last of the reinforcements for both sides pretty much on table. The advance guards of these were either side of the large orchard in the table centre but still in column for the most part other than the first brigade of either side and Lonnies two Brigades were poised to charge the gun in the village, whilst the rest of the village forces for both sides continued their various firefights.
So for our second visit to the game we had 2 1/2 hours on a Thursday evening. As the main armies where now converging I expected to see some real combat and was not disapointed. Ian took over the British forces in the village and the strain was already showing in this area.
To the American left both sides were beginning to occupy the big orchard and deploy forces on either flank of it. This would clearly become the focal point in this part of the battle.
In the village Lonnie charged the British Gun, a good dice roll and he was in before it could fire and that was that. He was now free to form a battalion on the flank of the Queens Rangers, another in front of them in the house and a battery of two guns to their left front meant they were in a fair degree of trouble.
Ina produced a small unit of Queens ranger cavalry and began to lap his skirmishers around the Continentals in the wood to add his fire to the beleagured light infantry.
To the left both sides were now mving into musketry range. The advance units were in the orchard along with a Hessian and British Grenadier battalion, whilst a further unit and gun protected their rear from the rest of the Hessians and a three gun battery. The second brigade in line turned off the road and advanced on the flank of the orchard to enagge the advancing British Grenadiers.
We were now in firefights right across the line of battle, the Queens rangers being forced back, Lonnies second battalion left them to be mopped up and charged the skirmishers out of their second building.
On the left however the troops to the rear of the orchard were taking a beating from the Hessian guns, but they were doing their job of keeping the Hessian foot from the rear of their comrades in the orchard, the American light horse moved forward to threaten the British Guards marching towards the rescue of the village forcing them into line and ensuring that the village would not be rescued.
Having seen of the skirmishers Lonnies foot were now manouvring to surround the Light Infantry and on the left long range firing had errupted.
A final volley from guns and foot saw the Queens Rangers break taking te General with them and the Americans had effectively put themselves in a strong position to dispute the table with the British. At this point we left having the promise of a further 5 hours Sunday game to see the battle to fruition.
Final day of gaming at castle Riley. I had been out in Leeds the night before so arrived by mutual arrangement 2 hours of gaming in.
Things had moved on a bit in the 2 hours or so before I arrived. In the village Lonnie has almost finished off the rearguard, finally destroying the stubborn Light Infantry unit. To the left however the Continentals have been forced out of the orchard and the units supporting its rear have taken a thorough beating by the Hessian Guns. To the right of the orchard however the British Grenadiers have continues to take a pounding and things look less forlorn.
Rob has been managing my old command and we now split things up so that Rob take the badly mauled Brigade behind the big orchard, I take the one to the right facing the Grenadiers and Lonnie commands the two Brigades in the village. We have a further brigade or reinforcements now which I start to move as they pass behind my brigade and Lonnie takes the skirmishers from this unit to support the village.
Lonnie brings up his guns to fire into the guards and I withdraw the cavalry so he has a clear field of fire. His foot then charge the skirmishers and force them over the stream.
Robs foot start to withdraw having taken a thorough beating, two battalions remaining to fire at the British in the orchard who choose to withdraw into the safety of the trees.
I am manage to throw some good dice for initiative meaning the Americans are able to fire first and the british fire is reduced having taken their casualties before firing. Some good hits on the Grenadiers force a morale which they pass but they are starting to look quite shakey.
We have ignored the baggage up to this point as it is safely behind the guards and steadily moving off table, however it has taken 3 DP's and any further poor dice will result in dead donkeys. Sure enough at this point Ken rolls a two and a baggage donkey keals over. It seems that the heat stroke may help the Americans if only Ken can roll a few more poor dice.
Another good round of firing from the American centre sees the Grenadiers take heavy casualties 10% in round of firing means another morale test. Unfortunately for me their returning fire is a double 6! A morale for the continentals sees them retreat and the Brigadier mortally wounded, in return the Grenadiers are also forced to retire leaving a hole in the British line.
Whilst a nce big hole in their line seems tempting what it has actually done is created space for a 4 gun 12 pounder battery which is really not good news for the Americans. Rob has managed to cling on behind the wood and Lonnie has consolidate his position over the stream but the AMericans are really in no position to push forward.
The British are in better shape but have lost a whole brigade and serious casualties to the Grenadier battalion. At this point, having reached a stalemate and a fairly historical outcome we decide its time to call it a day after 12 hours of gaming overall.
An excellent game thank you Ken, Steve, Lonnie, Ian and Rob.
So is British Grenadier the rule set for me?
To be honest I suppose that depends on the scenario and the people you are playing with. My feelings on the rules are pretty unchanged. They give a great feel for AWI, troops having to stop and reform dressing and organise quite often. The resulting firefights can take time to wear an opponent down, big games on big table have a significant amount of time manouvring and getting into position. All very evocative of the AWI.
But if you have a limited time to play a big game, or gamers who want to crack on these are not the set of you.
Personally I think for Cowpens and similar sized actions they are perfect and will work really well over 4 to 5 hours. and thats probably where I will use them.
Big games for now I will probably stick with Black Powder. They give a fun, fast game the downside being that if you use them for other periods the games can all start to blend into one another with not enough significant differences between eras.
I hope you enjoyed the write up as much as I enjoyed the game.
I hope to get another post in before Christmas kicks in so will save my seasons greetings until then.
Thanks for reading.


Beautiful, great looking pictures and troops, some gems on the table, such as the British units...and such as the palm tree in the orchard! VERY NICE...
ReplyDeleteThanks Phil, really appreciate it and so will Ken
DeleteLovely game to follow and look at, thanks for taking all the time to put something this big together.
ReplyDeleteThanks Norm, I nearly gave up when the first draft saved only 10^ of write up but persevered, already been back twice to correct errors.
DeleteGlad you enjoyed Roger, it's a great collection to get on the table, British Grenadier work very well if you have a permanent set up but as you say for a club night they have their limitations.
ReplyDeleteSee you next in the Desert.
Thanks for the game Ken, thoroughly enjoyed. Looking forward to Mesopotamia in the new year!
DeleteLooking awesome!
ReplyDeleteGame is a credit to Ken and the AAR a credit to you, I enjoyed looking at this and agree with your comments on the rules. BTW I assume the palm tree in the orchard was to date the battle????
ReplyDeleteThanks Howard, I will tell you all about the palm tree next time we meet!
DeleteWow. I am jealous. I want to come visit and play!
ReplyDeletecheers Grover, currently playing WW1 MESOPOTAMIA ON SAME TABLE, WRITE UP TO FOLLOW.
DeleteGreat report and useful conclusion about the rules.
ReplyDeleteJames
Useful article, thank you for sharing the article!!!
ReplyDeleteWebsite bloggiaidap247.com và website blogcothebanchuabiet.com giúp bạn giải đáp mọi thắc mắc.