With the Great Northern War project on the down hill straight I have been keen to have a big game and also get Dave's Russians on table.
Chris asked me to put on a Sunday game over the bank holiday at "The Barn" and decided this was my chance. With over 40 units of foot and 40 units of Horse on a 15 foot table it was going to be a very big game.
We would be using the very heavily amended Black Powder rules we have been play testing for the last few months. The Swedes, Saxons and most of the Poles would be my figures, the Majority of the Russians were Dave's and the rest of the Polish horse from Paul Robinson's collection.
8 players would mean that everyone had plenty to play with but we could also get a bit of a move on.
The inspiration for the game would be the battle of Kalizs in 1706 in Eastern Poland, the Forces however would be quite different to the historical order of battle to allow us to field the troops we had available.
In the historical battle nearly all the allied army was cavalry, a large force of Saxons, Russians and Poles enticing the Swedish Garrison along with their Polish allies to march out and face them. However we did have to substitute a lot of these horse for foot. I also beefed up the Swedes to make it more of a fight, historically the Polish allied to the Swedes rode away after the first shots and left the Swedes to be overwhelmed by massively superior numbers. I hoped to achieve a bit more of a game than that.
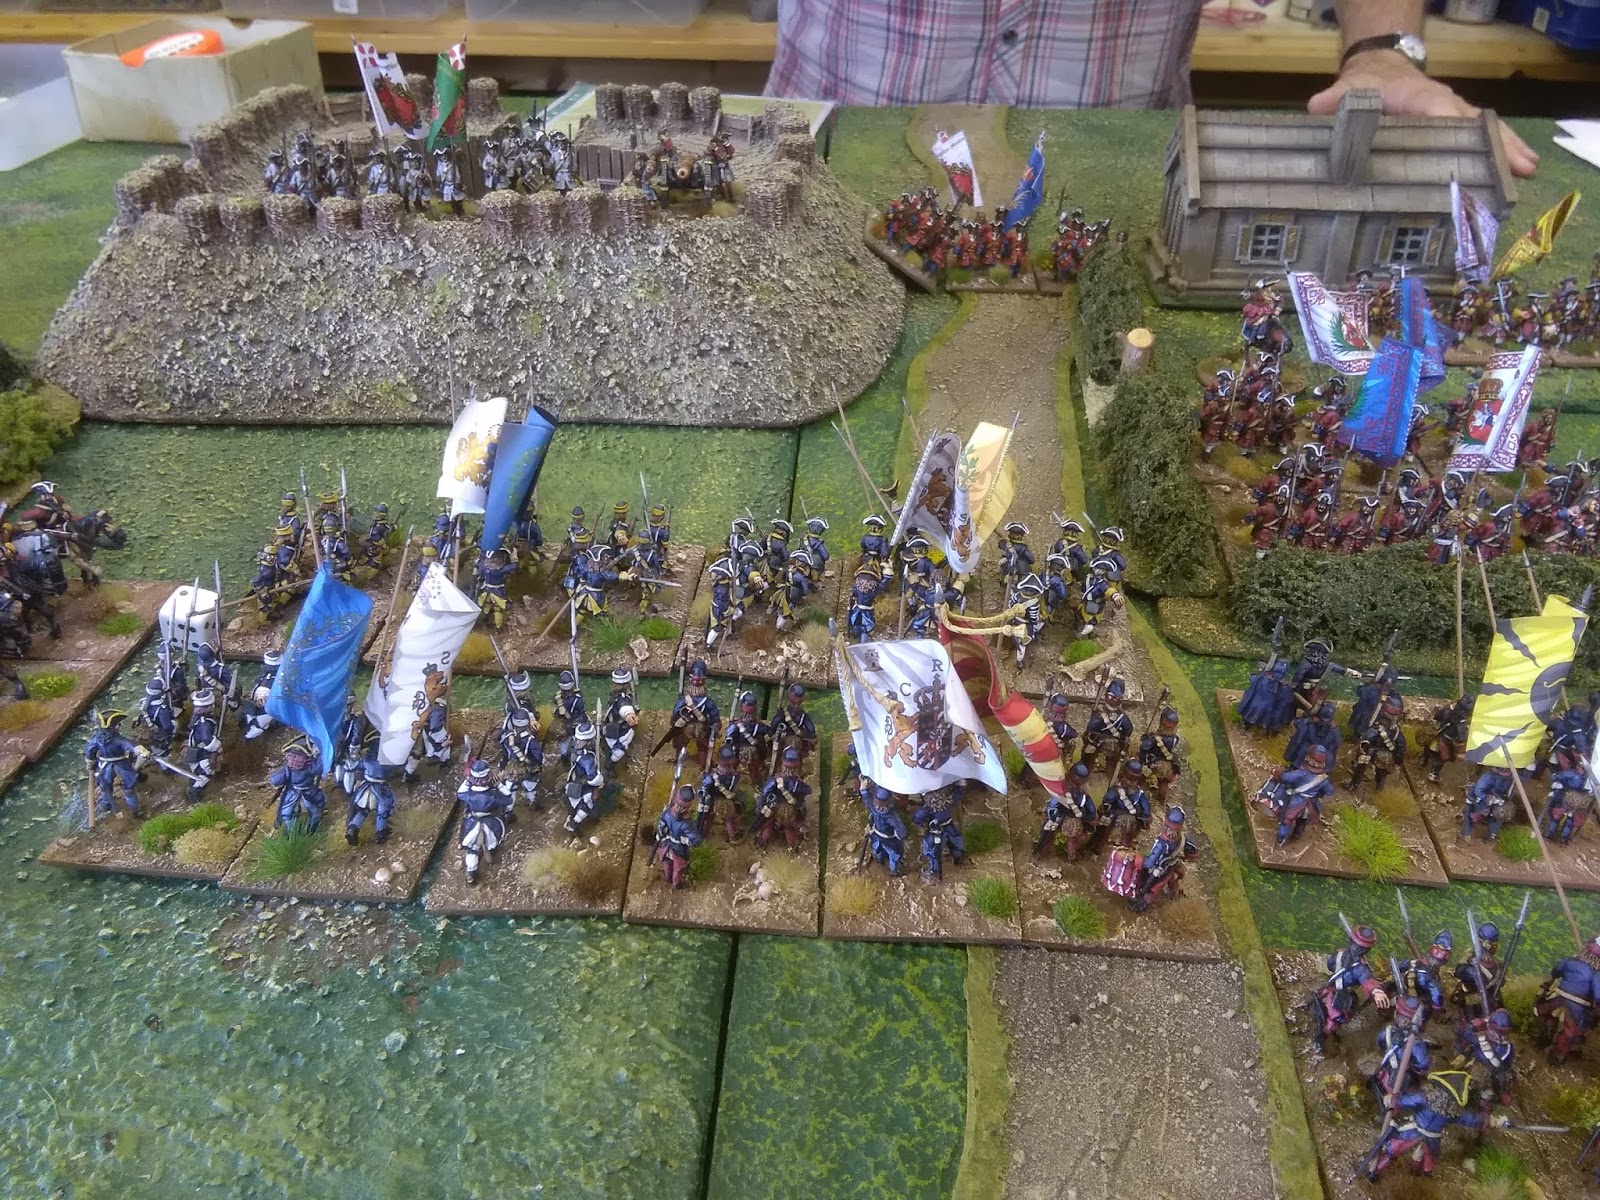
The Saxons would start on table with 9 battalions in 2 brigades. Each Brigade occupying a hedged farm enclosure for cover and a battalion slightly to the rear holding a redoubt, each of the brigades and the redoubt would have a gun. These would all be commanded by Richard.
The Cavalry would be deployed from the table edge, with Chris Charlton taking 8 regiments of rather dodgy Polish horse and the three units of Saxon horse also commanded by Richard. The Poles would take post on the Allied extreme right and the Saxon horse in the centre of the table in a gap between the Saxons and their Russian Allies.
To the left of the Saxons a brigade of Poor Russians ( 2 Cossack foot units and one line) also holed up in a hedged field to use as cover and were supported by a gun, behind them the Russians forces would arrive one brigade per turn on the extreme left of the Allied line, With two brigades of dragoons, one of Cossacks and 5 of foot, each supported by a gun, they would take a while to get into the thick of things, but their numbers were likely to prove overwhelming for the Swedes if they were not able to contain them. The Russians would be commanded by Dave and Paul.
The Swedish army was a much less impressive affair than in some of our other battles with no guard and lots of Polish allied cavalry.
Mark would be CinC as he was the only other player present who had played the rules regularly and the Swedes would have to do everything right to be able to win.
On the left Rich C had a brigade of 4 Swedish cavalry facing the 8 Allied Polish cavalry. Rich also had 3 battalions of "Swedish foot" however as in the real battle these were in fact garrison troops, regiments made up of Swiss and French prisoners of war recently captured from the Saxons (who incidentally had captured them earlier from the French in the low countries) These would be rated as average Allied foot and get non of the bonuses associated with the aggressive Swedes.
In the Swedish centre Keith had a brigade of 4 battalions of aggressive Swedish foot to throw straight at the Saxons in their villages supported by a gun and a brigade of 3 units of Swedish horse.
Finally on the right of the line Chris F would have 8 regiments of pretty poor Polish horse (Even poorer than the allied Poles) along with a brigade of quality Swedish foot and a gun.
Off table in reserve the Swedes had a brigade of veteran horse and another of foot, both 4 units strong. I put these in reserve on purpose to allow the Swedes to respond to the threat posed by the arriving Russians.
I would Umpire and giggle from the sidelines.
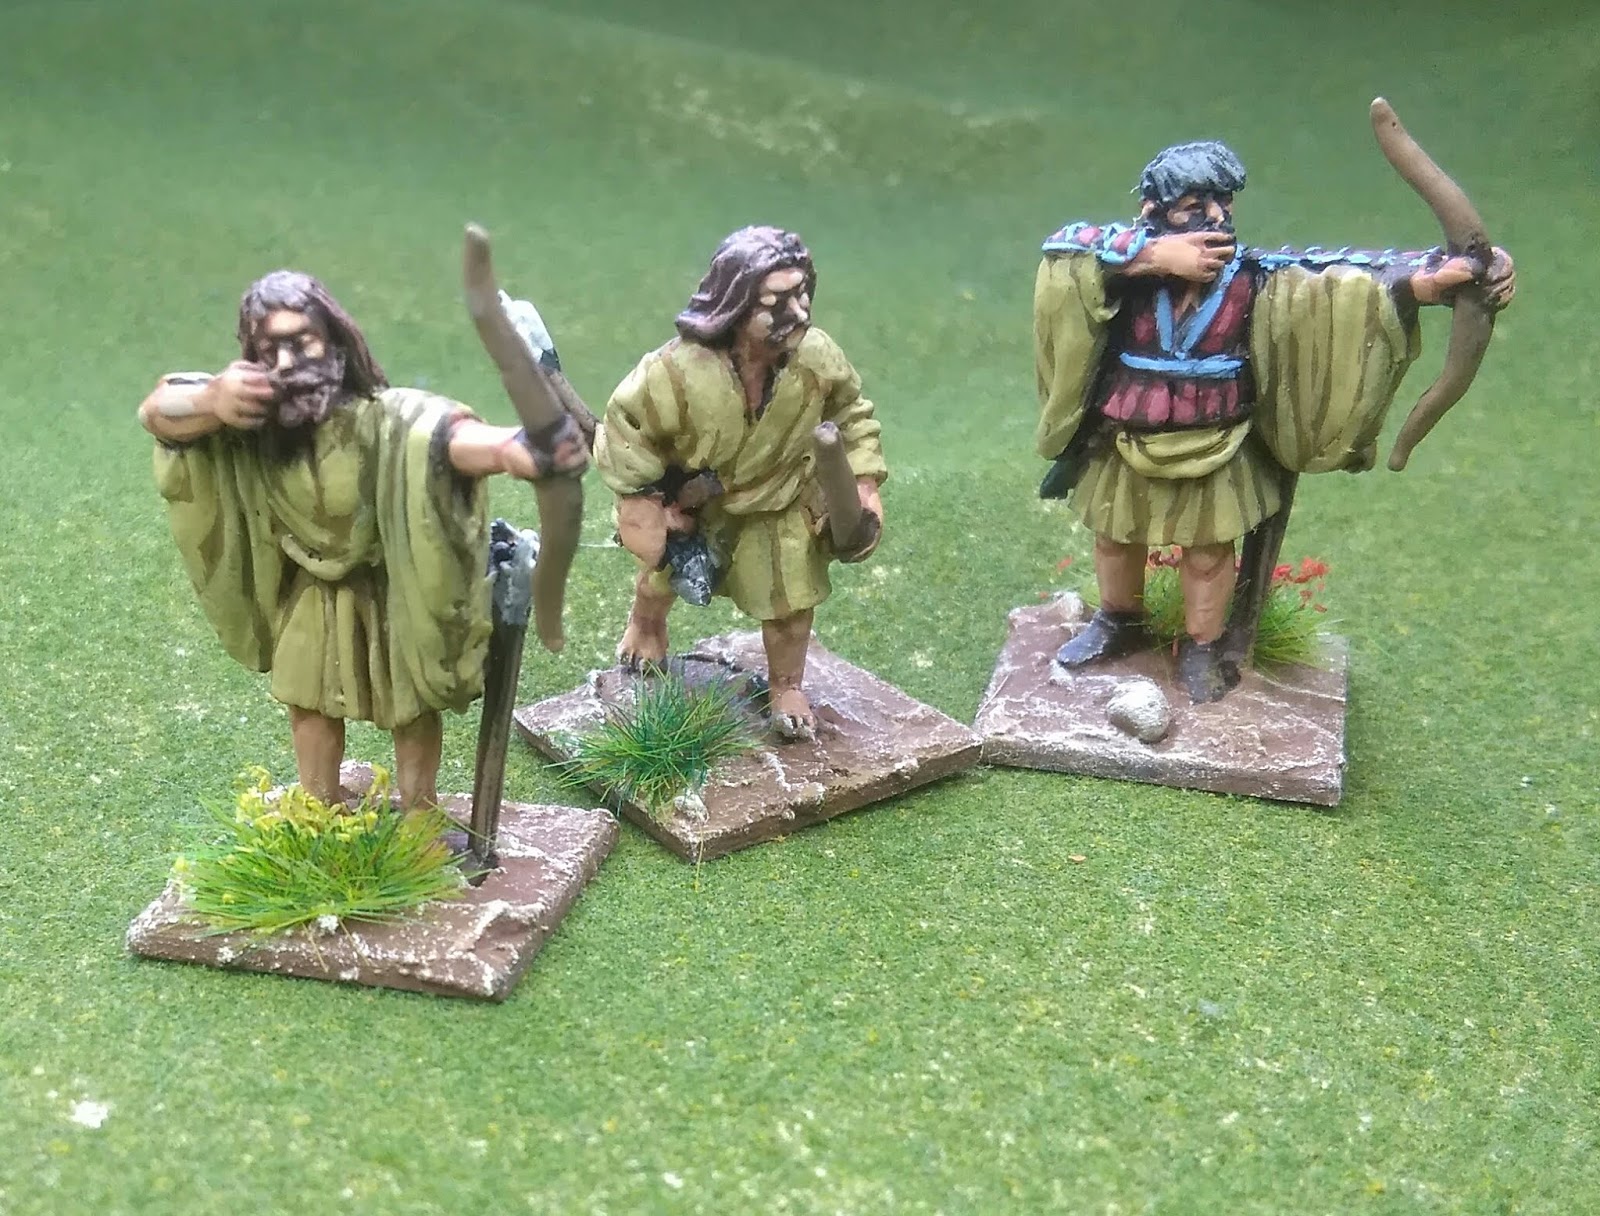
The above picture are of a dismounted unit of Polish Dragoons, my latest painted unit, more of them in another post, they didn't do a great deal in this particular engagement.
So the two sides respectively had the following:
Allies
26 Battalions of foot
2 Regiments Dragoons dismounted
8 Guns
21 Regiments of Horse
Swedes
15 Battalions of Foot
3 Guns
19 Regiments of Horse
The Allies would start with a third of their force off table ad the Swedes with a quarter. The Swedes would be up against and I wondered if I had made it too hard for them.
The Swedes went first and very quickly threw their cavalry forward on both flanks, the infantry however took a little more getting going, plodding forward on the flanks and refusing to move at all for Keith in the Centre.
The Allies responded by charging the Polish horse at the outnumbered Swedish horse on the Swedish left flank and the first melee of the game was on.
The Swedes barrelled into Chris's Poles and despite the quality of the Swedes, the Poles held, a couple of units pushed back but with the support of the extra units and some good dice rolling from Chris honours were pretty much even.
The Allies brought a brigade of decent Russian foot and a brigade of Cossacks on and quickly filled the gap on the allied left flank between the farm and fields occupied by the first brigade and the table edge.
Back to the Swedes and Richards Swedish Cavalry have another go at the Poles with the Swedish supports now thrown in and his garrison brigade advances on the Saxons sheltering behind the hedgerows of the farm.
On the Swedish right Chris Flowers throws his troops forward, the Poles charge the Cossacks who evade and unmask the Russian infantry brigade lined up behind them. Chris's Poles are in an unenviable position but undaunted he presses on with his Swedish foot and charges the Russians. One foot battalion of Russians break but the rest hold.
In the centre Keith's foot edge forward and his cavalry are engaged by the Saxons horse. Despite the difference in quality Richards Saxon cavalry manage to hold the Swedes.
The cavalry melee on the Allied right surges backwards and forwards, the quality of the Swedes is slowly beginning to tell but great dice from Chris and his numbers are keeping him in the game.
Richards garrison troops are trading ineffective volleys with the Saxons but don't have the quality to charge home, whilst Keith's cavalry have seen off the Saxons but the Russian horse are now pouring into the gap and the Swedish horse are very badly mauled. The Swedish foot doggedly advance on the contrail village and are halted by scathing fire.
Chris Flowers Polish horse are pulling back after the opening Russian volleys empty a bunch of saddles but his foot are having none of it and charge home breaking another Russian battalion but losing a Swedish battalion in return. Hi is doing OK but with a Russian brigade arriving in front of him each turn he is up against it.
Meanwhile the Swedish reserve arrives, a veteran brigade each of foot and horse with half the horse being guard. There is a great opportunity to pile the horse straight forward and push the Russian horse back, sealing the Russians into their small bridgehead but inexplicably the Swedish horse are sent to support the rest of their horse on the right against the Poles. The foot are sent to attack the farm on the left and the gap in the middle is left to whats left of the badly damaged Swedish horse there, just two units one of which is shaken.
On the Swedish left the cavalry melee continues to swirl and in the centre Keith is unable to make headway as the Saxon Volleys continue to dis-order the Swedes. With only two firing dice and their target in cover the Swedes make no impact on their Saxon opponents.
The Russian cavalry is now in a position to charge the Swedes and the first shaken unit is unable to counter charge and loses the melee.
Keith's reserve brigade of veteran foot now marches obliquely across the table with a view to storming the earthworks wedged between the farm and village and Richards foot continues its unequal firefight with the Saxon brigade on the extreme right of the Allied force.
On the Swedish right Chris remains aggressive with his brigade of Swedish foot whilst the Polish Cavalry brigade pull back and protect his flank, he destroys another Russian battalion and the Brigade is forced to a break test is broken, this is the best news the Swedes have had so far, unfortunately the Swedish brigade now has only 3 battalions left and 1 of those is shaken, undeterred Chris presses on with his two intact battalions against two fresh brigades of Russians, he is game and his aggression is preventing the Russian foot from breaking out.
Back to the centre and the Russian cavalry press forward and defeat the remnants of Keith's Swedish cavalry, the rest of the Russian regular horse and the Cossacks now have a wide open gap to press into the Swedish flanks and roll them up. Paul wastes no time at all in charging the Cossacks into the Swedish foots flank whilst the Russian dragoons turn left to isolate and destroy Chris's Polish cavalry brigade.
Kieth's reserve brigade have made good time and step out, unfortunately Keith's line of attack takes him between the two hedged enclosures filled with Saxon foot and guns, a supporting unit of Saxon dragoons and to their front is the Garrison of the earthwork, an untouched battalion of foot with another gun. These open up a lethal crossfire and Keith is topped in is tracks. The dragoon on his flank mount up ready to charge him and e has no choice but to turn and face them, his attack has ground to a bloody halt before it has really begun.
On the Swedish left the Cavalry reinforcements now make them selves felt and Richard presses Chris's polish brigade back and it begins to disintegrate, however the Swedish Garrison brigade is taking heavy casualties from its unequal firefight and is looking in poor shape.
Back on the right the Russian firepower has halted the advance of the last two Swedish foot and after a heroic struggle the third battalion breaks leaving just the Grenadiers standing their ground stubbornly. The Russian horse meanwhile have passed around the brigade defending the farm and are in position to charge the Polish horse.
Paul's Cossacks destroy the first unit of Swedish foot but then are forced to pull back and re-group but the remaining Swedish foot are continuing to take casualties and make no headway It is small consolation that the two brigades of Swedish horse on the left flank have almost pushed Chris Charlton's stubborn Poles off the table and are in complete control of that flank.
We are moving towards the end game now, the Swedish horse on the left flank continue to grind the Poles down, however one of the garrison battalions breaks under the fierce musketry of the Saxon Guard, the two brigades of Swedes in the centre have completely lost momentum and most are now shaken meaning they are unable to charge heir way out of the mess they are in, the Cossack brigade is menacing their right flank and rear and it is game over here for the Swedish attack.
In one last defiant act the Swedish grenadiers throw themselves forward at the Russians, a lone battalion against a division, Dave's Russians fail to break it but it hardly matters, it cant last much longer.
The first brigade of Russian dragoons charges the Poles, they hold on for the first round but start to crumble after a series of fierce melees. After two turns the Poles are pushed back and the gaps between the different parts of the Swedish army begins to widen.
Its four o'clock and we have played for nearly 5 hours, the Swedes are in no position to continue the battle and although there are some post ivies to be taken (Chris Charlton's Poles hold about 5 square inches of ground) they don't come near balancing the negatives for the Swedes who graciously accept defeat.
A convincing win for the allies. The Swedes needed to get it right to stand a chance of winning and that didn't happen. The Saxon foot were content to poor a withering fire into the Swedes from their defences and sit tight whilst the Russians had realised that they could sacrifice whole brigades of foot to wear the Swedes down, but the Swedes could not afford the attrition.
The rule amends stood up to the test of a big battle with multiple players so it was a success and everyone got a full game. I loved in particular how the cavalry melees ebbed and flowed. In the end however it might just have been a Little too difficult for the Swedish players.
I hope you enjoyed our wee game, thanks for reading.