Saturday 30 April 2022

A Darn Good Whipping, AWI Sharp Practice AAR

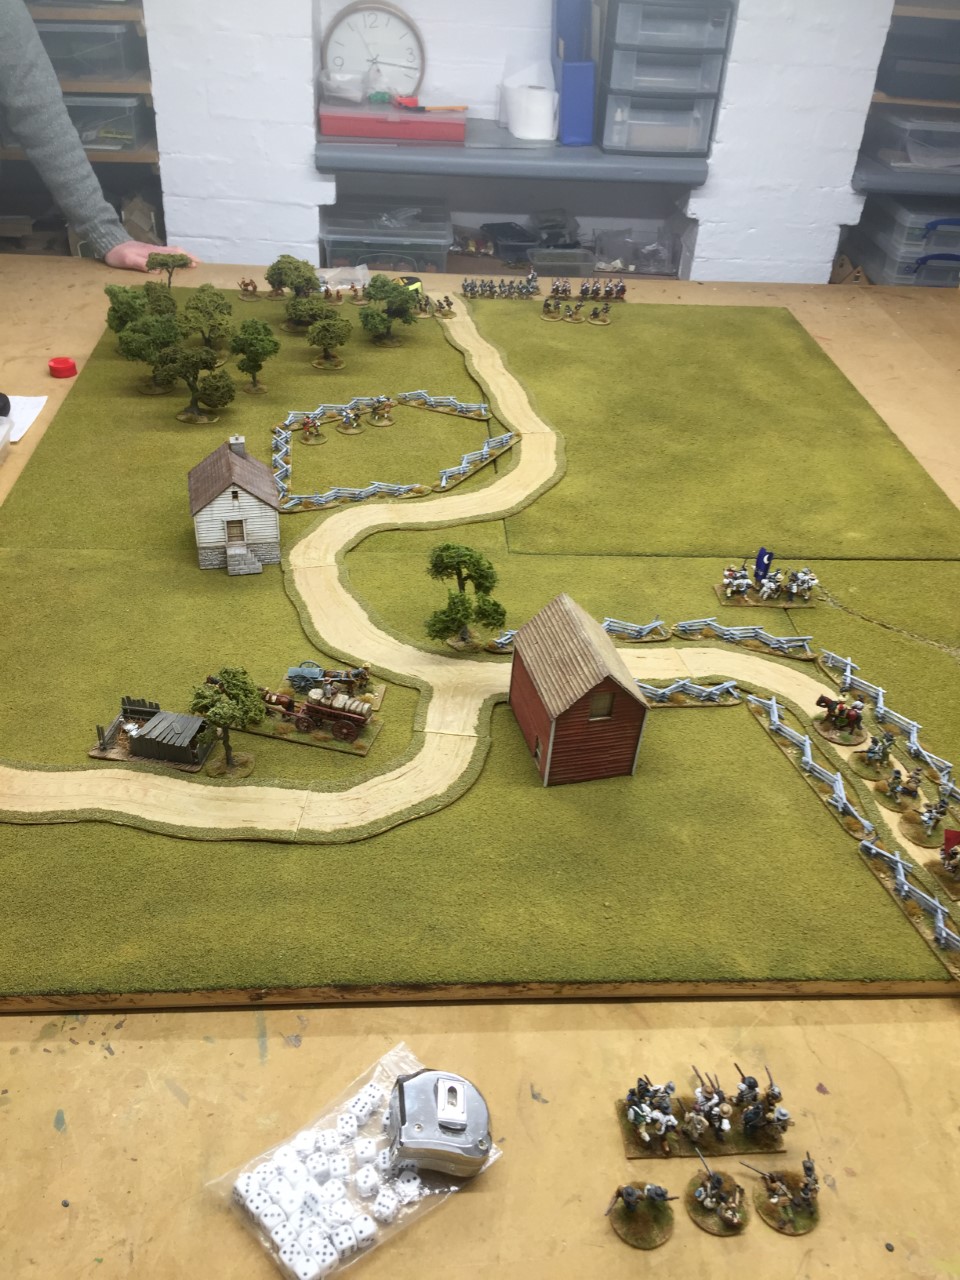
Game night at Steve's again and he had set up a small AWI scenario for Chris Charlton and I to play.

Loyalist Militia must hold a barn with munitions from the Marauding Crown Forces.

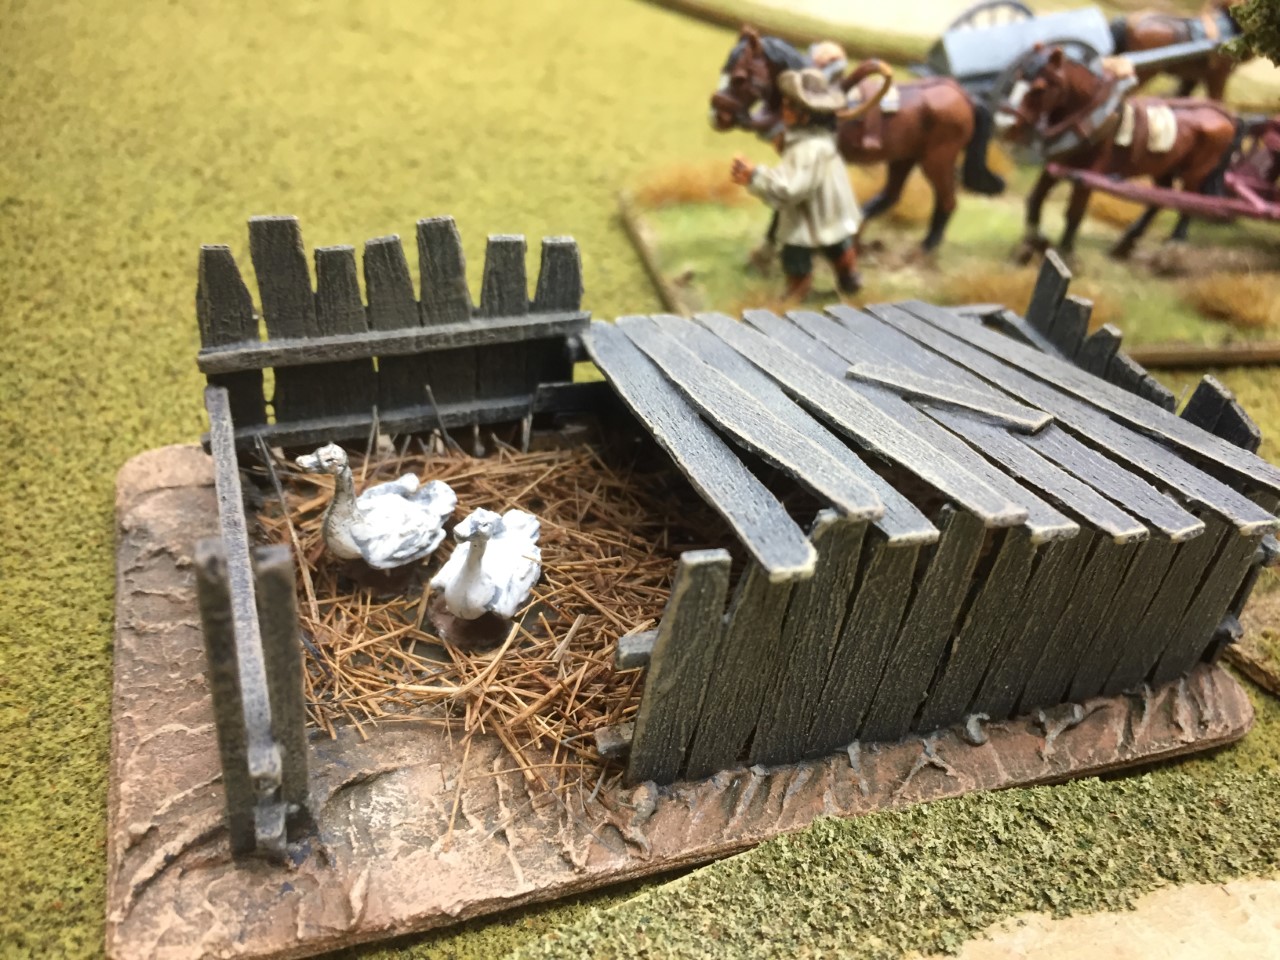
This duck run is a lovely addition to the table.

The American have|:

3 groups of 12 militia  all with level 1 leaders.

2 Groups of Riflemen with level 2 leaders

1 Group Skirmishers with level 1 leader

Level 2 force commander.

54 figures and 10 commander points


The Tories have

1 Group of 10 Indians level 1 leader

2 Groups of 6 Jaegers with level 2 leaders

2 Group of 8 Loyalist regulars level 2 leader

1 group 6 Cavalry level 3 leader

Level 3 force commander.

44 figures and 13 commander points

So the Quality and Command with the Tories but the Militia have the edge in numbers.


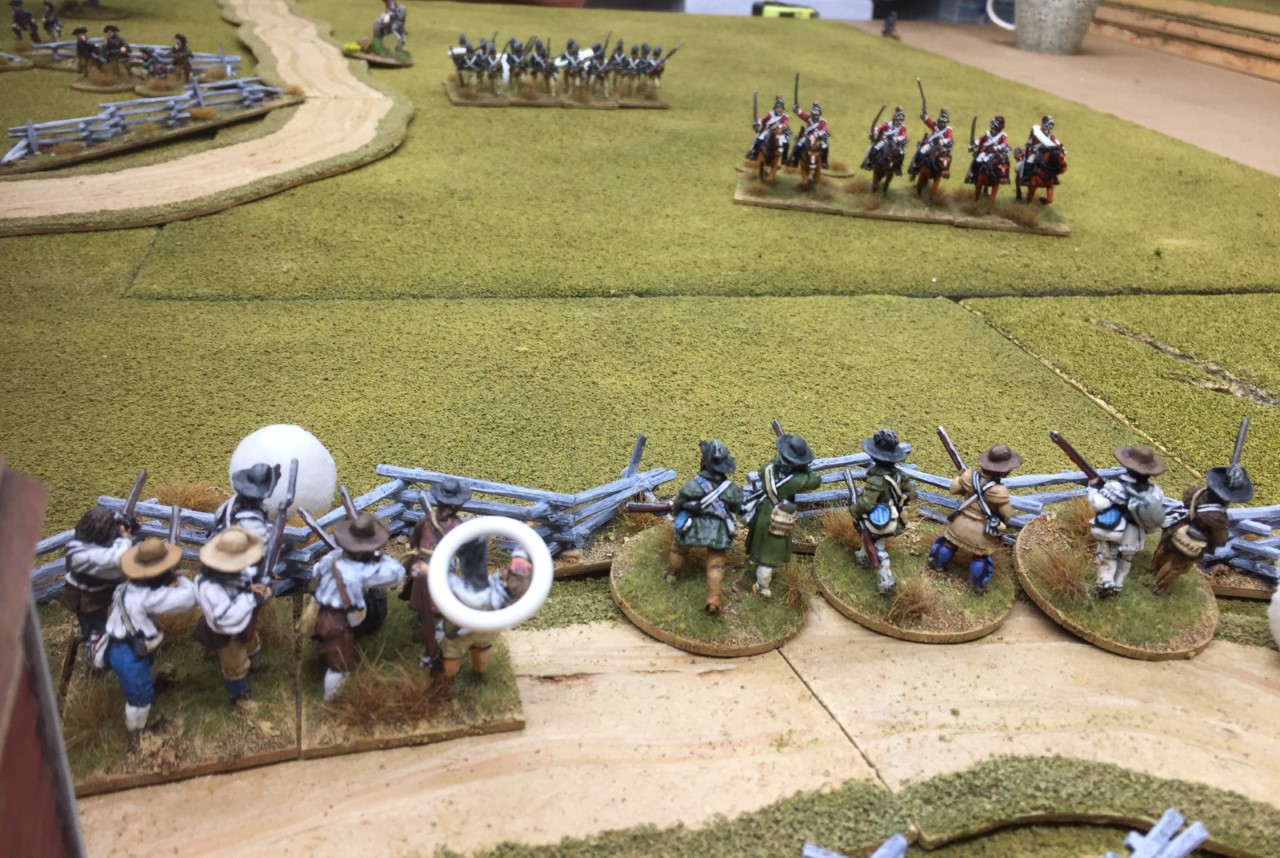
A bunch from both sides are already on table to speed things up with the American Militia skirmishers well forward on the fence line.
The Jaeger Card comes out and we are in trouble already two moves forward and they open fire killing one skirmisher and giving me two shock.
Initially the action is exclusively the Jaegers pushing back the militia skirmishers whilst the Indians sneak around my flank, all three of us feeling this looked decidedly one sided and the Militia were doomed.
I manage to get my Rifles forward and put some shock onto the Indians before they can get into musket range. The Militia skirmishers put a casualty on each unit of Jaegers, however the Militia are already at half strength and carry some shock.
The cavalry start to get forward on my right flank but I am not too concerned as none of my troops are in the open.
The cavalry close on my left and the Rifles snipe one out of the saddle whilst two Militia units volley the British Legion and start to inflict casualties and shock slowing them down. 
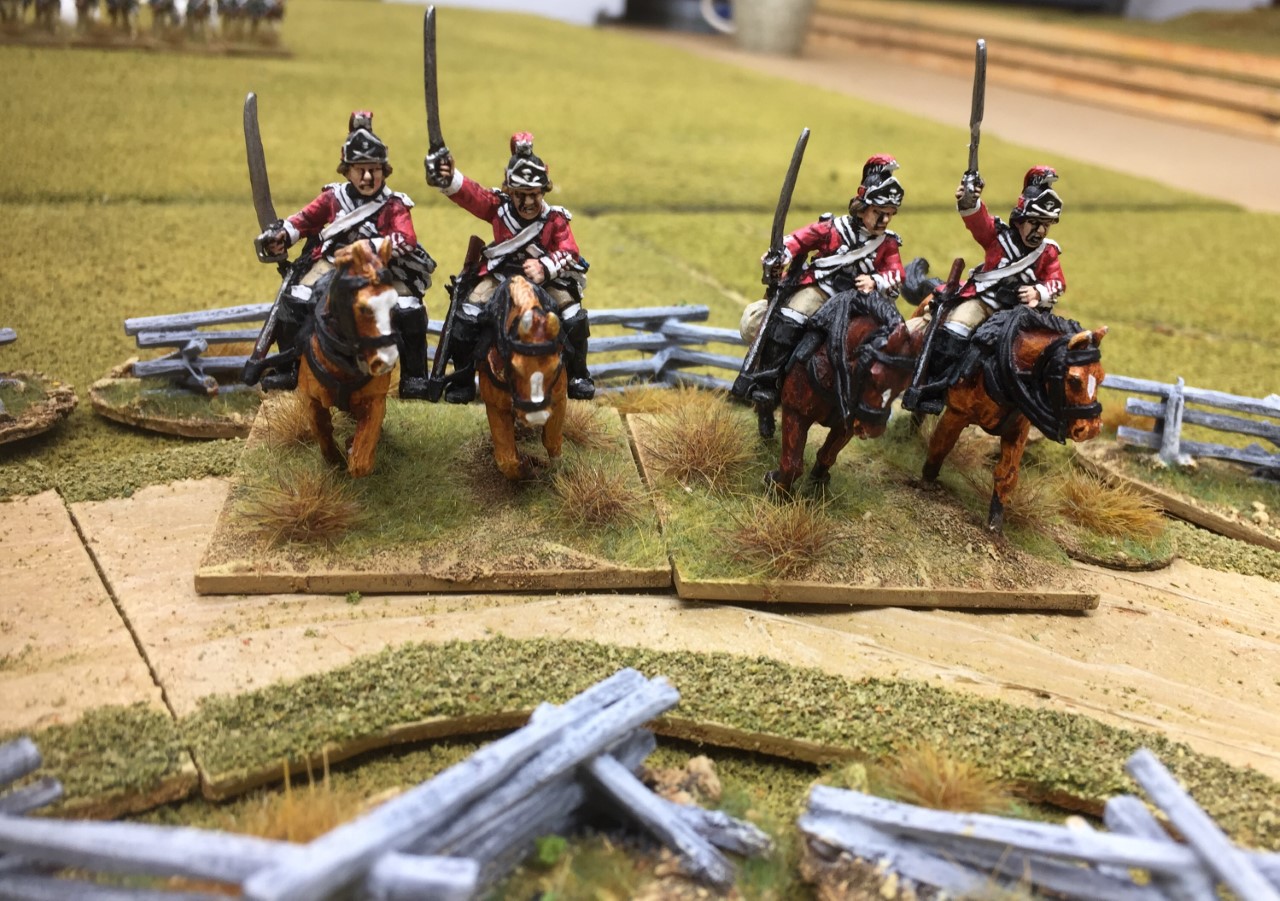
Before you know it the cavalry are on my rifles and the fence apparantly provides no defence or obstruction at all. So with dice removed for no bayonets and not loaded the cavalry wipe them out to  a man and I loose morale points, taking just one horseman in the process. Oh dear!
Meanwhile my third militia unit joins the left hand rifles in pouring fire into the Indians and they are in real trouble with a massive amount of shock.
The cavalty meanwhile turn around and prepare to charge the Militia unit on my right flank.
The Indians are forced back to the edge of the woods and my remaining two militia skirmishers run into the cottage.
The Jaegers are on my flank but I cant bring the Militia under control so they keep blazing away at long range at the British Legion whilst taking casualties from the Jaegers a stones throw away.
The British Legion are in a bit of a mess but the Cavalry have swung the tide back in favour of the British.
The cavalry charge the rear of my Militia who I am again unable to bring under control and so ignore the threat blazing away at the British Legion, a short bloody melee where the Militia have just one dice sees 8 of the Militia cut down and the other 4 flee.
My next unit of Militia has Jaegers on one flank and cavalry on the other, true to form I am unable to bring them under control and they continue to fire at long range at the poor old British Legion.

So the Cavalry charge for a third time, again I am unloaded and without bayonets. The result seems a forgone conclusion
Chris rolls the most amazing dice and my Militia are wiped out.  A volley into the farmhouse from the Jaegers also sees the last of the Militia Skirmishers cut down.
My force morale is gone completely and I have just one group of Militia and one of rifles remaining, a complete victory for the Tories.
Really interesting, we have not used much Cavalry in the past and they were a real game winner in this instance. We rarely get such a clear Victory, well done Chris I was thoroughly whipped. Our games often switch part way through with sides having the upper hand this one switched from British to American and back again. 

Great fun thanks guys.


Friday 22 April 2022

A Limited Return to Painting, 40mm Peninsular Workbench

You may have noticed my recent posts have been sharing after action reports and based figures rather than painting updates, this has been due to a bit of tummy trouble. Apologies all but I am slowly getting back to painting and here is where the focus has been.

At last some French ligne. I have been promising myself I will get some of these done for a few weeks now, enough of the ligne completed will allow me to put on the first small game so I do need to shift myself really.

So the first lot have three in Habit and one in sleeved waistcoat. As usual I want lots of variety in units so these guys with the same coloured trousers will be in two different groups hence the different coloured company pompoms.

The blue grey is one of my favourite colours from colour party paints, field blue. The off white is also a nice addition rather than the persil white we might normally use.
With this next lot I have included two Bonnet De Police pinched from the Spanish regulars sets. I particularly like how these two have come out and the colour schemes on the trousers.
Again a mix of blue and orange pompoms, the Bonnet de Police of course can be any company we like. Habits are purposely faded blue.


The next three are all Spanish Guerilla's from Sash and Saber. The two outer ones are OK but the inner figure is actually quite nice. Its the heads that make many of these and I like this particular head.
I am keeping the colours very subdued for the Guerilla's with the exception of any bits of uniform I can throw in to suggest the remnants of defeated regular units taken to the hills.
Lastly a couple of figures to share with you that I am keeping my hand in on the 28mm. I intend to add another unit of Picts to my Arthurian sub-roman period troops and this one sat part painted on the desk for a while. The North European Bronze age figure has a head swap and shield swap. Its only after photography I noticed I have not finished this guys elbow where I had to re prime it after a fall.
I have a stack of North Europeans to paint still and the recent game of Midgard leaves me thinking I will need to get them painted if I want to have two sides for a game.

Expect to see more Bronze age coming of the workbench, but expect more French Ligne first I think.


Tuesday 12 April 2022

Live Free or Die Playtest AAR

We have been playtesting Bloody Backs for the AWI but Steve had also been looking at a couple of other sets and now seems a good time, whilst Bloodybacks is fresh in our minds, to try a couple of others and compare. We will return to Bloodybacks however.

Live Free or Die are simpler in many ways, movements and formations for instance are the same for each unit type, Morale is the main differentiator.

Both sides had decent sized forces with a mix of troops qualities, as you would expect the British regulars were amongst the better troops on table. Chris C commanded the Crown Forces defending a small farm whilst Steve and I divided the American forces advancing upon the dastardly Tories.
The rules are a development from the old Loose files and American Scramble, the basic component is the stand or base with units taking morale tests after loosing a base and firing being 1 dice per  base. For most things you require the roll of a 5 or 6 on D6 so fairly simple. Infantry move is 12 inches, skirmishers 24 inches.
Both sides deployed and quickly start to get forward with the America line steadily advancing and the Crown forces moving to take advantage of what cover they can.

The Jaegers deploy on the edge of the woods in order to take pot shots at the advancing continentals. We found the skirmishers very ineffective and came to the conclusion we had just used them incorrectly and reduced their volume of fire by too much. 
Supporting the Jaegers Chris pushes a unit of Tory militia through the wood on his left flank.
On the American left flank I push my rifles forward, they move at double the speed of the regulars but as with the Jaegers we found these chaps pretty in-effective. Mainly  I think this was how we interpreted the rules. You fire by base but as our skirmishers are in 2's we used 2 bases as one firing dice, a group of 12 figures then gets 3 firing dice, but as they looked pretty big both sides just got one group each which did very little at all. I personally think we should try using a base as a base and have more numerous but smaller units. One to try next time.

On the left the Americans have advanced to within range of the British who have marched out to form a line on their flank with the combined grenadier and light infantry battalions. In the centre the Militia are still catching up/ On the right Steve is contesting the wood with the Militia whilst he manouvres his guns into position in the centre.

In the trading of volleys both sides loose a base forcing a morale check. Each quality has a different number of dice needing just to throw a 5 or 6 once. So British regulars get 4 dice whilst Militia might only get one making it much harder to pass morale tests. In this case my New Jersey regiment have 3 dice and we fall to roll a 5 or 6 and are pushed back 12 inches.
Next round and my second New Jersey Regiment force the British Grenadiers back whilst the British gun inflicts enough casualties to push back my troops. The Militia meanwhile have advanced up to the fence line supported by Steve's continentals.
On the right Steve has seen off both the Jaegers and then the Tory militia, he is however reluctant to send his slightly brittle continentals through the woods into the waiting volleys of 2 very large first class British battalions.
At this point the Militia are hit by a volley and we see one of the interesting aspects of the rules, not that I was happy about it at the time. 

The volley took the DMZ 's over 5 (disruption markers) and so removed a base causing a morale check, I needed a 5 or 6 with only one dice and didnt make it so had to retire one move. The militia passed through another militia unit so both units take a further DMZ. Any unit of equal or lesser rating within 6 inches also needed to take 3 more DMz's so meaning the Militia unit behind it had now taken 4 extra DMZ's on top of the one it already had, so they lose a base and force a a morale test which it failed. So the second one was forced to retire and in doing so passed back through the first one adding another DMZ and three more for being within 6 inches of the morale failure, this again removed a base causing a morale check which it again failed and pushed back through the second one again adding 4 more DMZ's. Fortunately for me thats where it stopped but the brigade was a bit of a mess. This is what the rules refer to as a chain reaction and is deliberate with Militia in particular being prone to running away and taking the rest of the militia with them.

On refection its pretty realistic but was a nasty surprise at the time.
Throwing caution to the wind I advance my rifles onto the flank of the British gun, again they are pretty useless and the Grenadiers advance back into the fray and make short work of them with a devastating short range volley.
I have now re-ordered both my Jersey battalions and advanced back into the fray. Steve on the left is loitering on the far edge of the woods pinning the British regulars without getting shot up whilst his artillery is peppering the rest of the British line.
Chris decides now is the time to advance with his Hessians, the American guns however force him back with short range fire.


Chris's Welsh Fusiliers take a pounding and need a morale test, he made me take this photo of the 3 sixes he threw to pass his morale. Pfft!
The British line battalion behind the fence takes a good volley from Steves Continentals supported by the guns, a base goes and Chris is unable to stop them retreating, the Fusiliers meanwhile advance onto the centre of the American line and the reformed Hessians and Militia are pushed across to support the crumbling British right flank.
The Fusiliers get forward but are stopped by concentrated American fire.
The Jersey boys have seen off the light battalion and the Grenadier battalion and line the flank of the British, they think its all over, but two well aimed volleys from the Hessians and Militia force a morale test on the Jersey battalions and both retire.

A close run thing and more in the game but its 10pm and we have tested the rules pretty well. We decide that the Americans have snatched defeat from the jaws of Victory and declare a narrow British victory.

An interesting rule set that provided a fun and simple game, we will certainly try these again as well as giving Bloody Backs another outing or two as there seem to have been some updates to those rules recently too.

Thanks for reading, watch this space for the next test game.