Having reminded ourselves of the rules I wanted to test the game mechanics with something slightly more complex.
A mini version of Suraj Khund seemed a good option and one I had in mind for a while.
Suraj Khund was a divisional level battle in between the first and second sieges of Multan. Unusual as the operations around Multan had irregular forces on both sides in large numbers and was quite confused with both sides launching attacks at the other at the same time.
The first troops to arrive at Multan when the city rebelled were Muslim irregulars and native trained regulars of Daudpatra, led by Lt Edwardes these forces consisted of several thousand Pathan and Baluchi tribesmen bolstered by 2 battalions of trained matchlock armed troops. These were eventually reinforced by General Whish with British and Indian troops and then also by Sikh regulars, I know very confusing.
Things took a turn for the worst when the Sikh regular brigades changed sides and the outnumbered British and allies had to withdraw 9km and dig into a fortified camp.
The British and allies dug themselves in to await reinforcements and the Sikhs put up earthworks and artillery to annoy them whilst they got busy arguing with each other.
The British decided to attack the Sikh positions in flank and relieve the pressure on their camp, just before they launched their attack the Sikhs launched their own on the defenders of the camp, in this case a part of the defences entirely covered by Native irregulars and native matchlock troops
So the game starts with the unusual feature of the Sikhs attacking with regular foot, whilst the "British " are defending with native irregulars.
To add to the confusion I chose not to tell either player what was going on until the British flank attack deployed on table.
The Sikhs had 2 battalions of matchlock troops with a large gun in their entrenchments, supported by two units of tribal irregulars and 2 of irregular horse. On their left flank 6 battalions of regular Sikh foot are advancing to attack the British native allies.Facing the Sikhs are again 2 battalions of matchlock armed natives with a gun in earthworks, these are supported by 5 units of tribal irregulars pouring out of the British camp to block the Sikh advance.
Steve commanded the Sikhs and managed to gain the initiative for the first three quarters of the game. Unfortunately one of his first cards was "uncontrolled advance" this meant testing each of his "tribal" units on a roll of a 6 they charged headlong at the nearest enemy. This led to one tribal unit leaping out of the defences to charge the matchlocks in their earthworks ending the turn by itself in the middle of no mans land between the defences.
Meanwhile Chris decides his 5 units of tribal irregulars are best used as a speed bump to disrupt the Sikh regulars and throws them forward on his right flank.
Steve is meanwhile able to get his Sikh regulars forward on his left, once past the earthworks he can start to deploy them into a longer line to make use of their numbers.
The game is shaping up nicely for a straight up fight with most of the fighting on one flank with the rogue Sikh tribal unit almost on the flank of the British works as they get a second move.
The tribal irregulars are looking very dangerous on the flank of the matchlocks, but you should always listen to your mum and not go wandering off alone..
At this point the Company flanking Division arrives through the scrub, Steve is heard to say "thats unexpected" or something along those lines, possibly questioning my parentage.
It will be interesting to see how the rules cope with the British regulars piling into one flank whilst the Sikh regulars take on the Muslim Tribal warbands on the other.
Chris has opted to push his cavalry through the centre with an infantry brigade either side supported by a horse gun each.
Meanwhile the Tribal irregulars have closed with the Sikh regulars on the British right and one unit of irregulars is running across the face of their own entrenchments to hit the rogue Sikh warband which is now caught between the irregulars on one flank and an Indian infantry Brigade on its other.
Chris's warbands give the Sikh foot ineffective volleys and close in, they will stand off taking the opportunity to fire at each other until one side draws a melee resolution card. The Warbands have done their job though as they act as a "speedbump" to stop the Sikhs assaulting the earthworks..
With both the flanking British and Warband putting a volley into the rogue Sikh Warband it wisely legs it back in the direction of its own earthworks less a few casualties.
Meanwhile the lead flanking Brigade is almost at the Sikh trenches and facing a bunch of irregular cavalry.
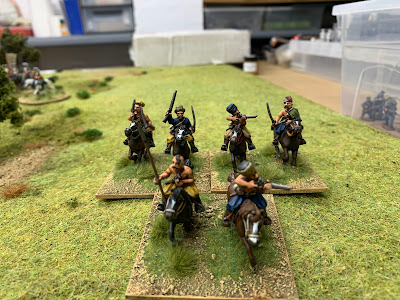
Lovely Bengal Irregulars from Empress, originally by Iron Duke, I actually took a picture of this base to remind me to repair the ankles of the grey horse which were about to snap!
The rogue Sikh Warband has fled from the Company foot only to run headlong into Bengal Cavalry halfway back. Its really not been their day.
Steve turns his right hand battalion of Matchlocks to face the British intent on contesting the entrenchments.
Chris gets a cavalry move card and forms the Bengal Irregulars then charges the Sikh Warband. As its cavalry charging foot we prosecute the melee immediatley with no need of a card.
Chris needs 5's and 6's to inflict a casualty in the melee, he made me take this picture he was so pleased with his dice throw, 8 hits from 11. Naturally enough the rogue warband is destroyed.
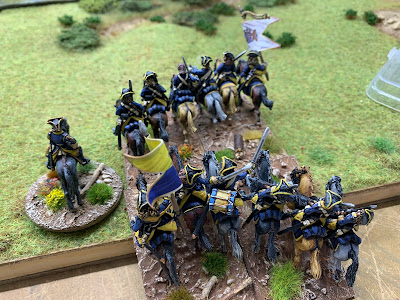
The British get plenty of advantage in hand to hand as you might expect. Each side gets a dice per base plus a dice for level of quality, British is 5, sepoys usually 3 or 4, Sikh regulars 4, irregular 2or 3. The British also get 2 more dice for aggressive and a further dice for bayonet. In this particular instance they also get a dice for drawing the Melee resolution card. Sikh regulars get a plus 2 for aggressive whilst Sepoys get a plus 1 for bayonet making Sikh regulars typically slightly better than sepoys and both generally better than the Tribal irregulars. However in this case Steve was able to hold his own with good dice despite having less dice to throw, The Melee went to three rounds depleting both sides before the British eventually had to pull back with just two bases remaining.
I missed getting a photo of the Irregular cavalry charging the gun, as it was unloaded this was pretty one sided and the gun crew ran away. The cavalry's test for winning saw them withdraw to reform.
With the British decimated it was now the turn of the Bengal Sepoys to take on the Sikh Matchlock men.
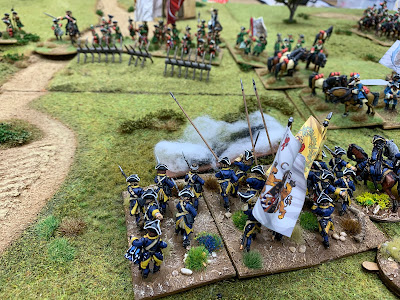
The Sikh Matchlocks and the first Sepoy battalion fight themselves to a stand still so the second Sepoy battalion passes through the first and volleys the badly mauled matchlocks.
The Company get an infantry move card and advance the second brigade on the Sikhs, supported by one battalion of matchlocks from the earthworks Chris means business.
The Bengal Cavalry advance in support of the foot. Although charging an unbroken line of Sikh regulars may not be a great idea.
Chris gets another British and Allies infantry move card and gets forward again.
Chris has brought the last 2 bases of British back into the fight whilst Steve deploys the second matchlock battalion to face them. To their right the second Company brigade has charged the Sikh regular line after giving a short range volley, unfortunately one battalion of Sepoys breaks under the Sikh closing fire and routs, the other two close with the bayonet.
A word about some of the mechanism's here. The uncontrolled advance may seem extreme. However there were a number of engagements where commanders found it difficult to control their untrained tribal elements who just wanted to get to grips with the enemy. The retreat of a full move or two moves when failing morale may also seem a little extreme, but without this we found that troops failing melee came straight back to fight far too quickly so this mechanism forced them to spend time re-organising and marching back before they could get back involved.
In terms of forces the actual battle had many more irregulars on both sides. The British flanking force had 6 battalions as our game but was missing companies from each left to guard the camp, it had 6 horse guns so our two gun sections a good representation but it also had 2 squadrons of Bengal Native Light Cavalry to supplement the irregular Bengal Cavalry. The Sikhs may have had thousands of irregular cavalry milling about and possibly having 9,000 foot and 3,000 horse. The British irregular and tribal elements were mainly foot and again were likely to have numbered in the thousands with more irregulars being fed in by Edwardes from the camp as they became available, he was also able to feed in 2 battalions of Van Cortlandts "Sikh" regulars, actually Muslim troops possibly best represented as uniformed irregulars.
A much simplified version of a battle I hope to do on a much larger scale in future and a very good test of the rules which held up well and gave us a fun game for both sides.
Hopefully you enjoyed the little write up, as always thanks for stopping by.


